VOLTEX SAS135MH - Smoke Alarm Manual
- 1 Introduction
- 2 Important Safety Information
- 3 Recommended Installation Locations
- 4 Nuisance Alarms
- 5 Buttons and Indicators
- 6 Wiring Diagram
- 7 System Interconnection
- 8 Installation Procedure
- 9 HUSH Mode
- 10 Do Not Disturb Mode
- 11 Test Procedures For Hardwired Interconnection
- 12 Replace the battery
- 13 Audio and Visual Indication
- 14 Maintenance
- 15 Alarm Memory
- 16 Trouble Shooting
- 17 Warranty Information
- 18 System Configuration
- 19 References
- 20 Download manual
- 21 In Other Languages
Introduction
Please read these instructions carefully before installation and operation.
| Sensing Type | Photoelectric (Type A - contains no radioactive material) |
| Power Supply | 220-240V AC 50Hz Replaceable DC 3V battery: Pairdeer/ Huiderui CR17450 |
| Interconnectivity | Hard Wired |
| Battery life | 10 year backup Lithium |
| Wireless Option | Wireless Module SASWM |
| Interconnection | Maximum 24 paired alarms Max wiring length between first and last alarm: 150 m |
| Size | Φ135mm x 45mm |
| Temp range | 0°C - 45°C |
| Max Humidity | 93%RH |
| "Alarm Signal Pattern" | ISO 8201 |
| Alarm Volume | 85dB at 3m |
| Hush Time | 10 mins |
| Compliance | AS 3786: 2014 |
| Certification | CSIRO Verification Service |
Important Safety Information
- This Voltex Smoke Alarm is designed for use in dwellings and shall be installed by a licensed electrician. It is intended to detect smoke before it reaches the occupants of a building. The ensuing alarm is designed to wake the occupants and give them time to evacuate the building.
- This smoke alarm SHALL be installed in accordance with national and local council building regulations and the latest edition of the Australian and New Zealand wiring Rules AS/ NZS 3000. A simplified, by State, installation requirements guide is available on Voltex's website.
- ALL ELECTRICAL WORK MUST BE CARRIED BY A LISCENSED ELECTRICAL CONTRACTOR OR ELECTRICIAN.
Recommended Installation Locations
- At least one smoke alarm shall be fitted on each storey (including basements) - in each bedroom and in corridors or hallways which connect bedrooms and the rest of the dwelling or as required by relevant local legislation.
- Where practicable smoke alarms should be placed on the ceiling.
- It is important to install the smoke alarm in the centre of the room, avoiding dead air spaces (an area in which trapped hot air will prevent smoke from reaching the alarm). Smoke alarms must not be placed within:
- 300mm of a corner of a ceiling and a wall
- 300mm of a light fitting
- 400mm of an air-conditioning vent
- 400mm of the blades of a ceiling fan
- Smoke alarms must be paired (interconnected) with every other smoke alarm so they all activate together.

Where it is not possible to place the alarm on the ceiling, the smoke alarm may be installed on the wall at a minimum of 300mm and a maximum of 500mm off the ceiling at the junction of the wall.
There are special requirements for stairways, sloping ceilings and ceilings with exposed beams. Specific requirements are explained in the relevant Building Regulation.

(Exposed joists or other projections such as exposed beams, rafters, trusses, etc.)
Nuisance Alarms
To reduce the likelihood of nuisance alarms, it is preferable that smoke alarms are not located near cooking appliances, bathrooms or laundries
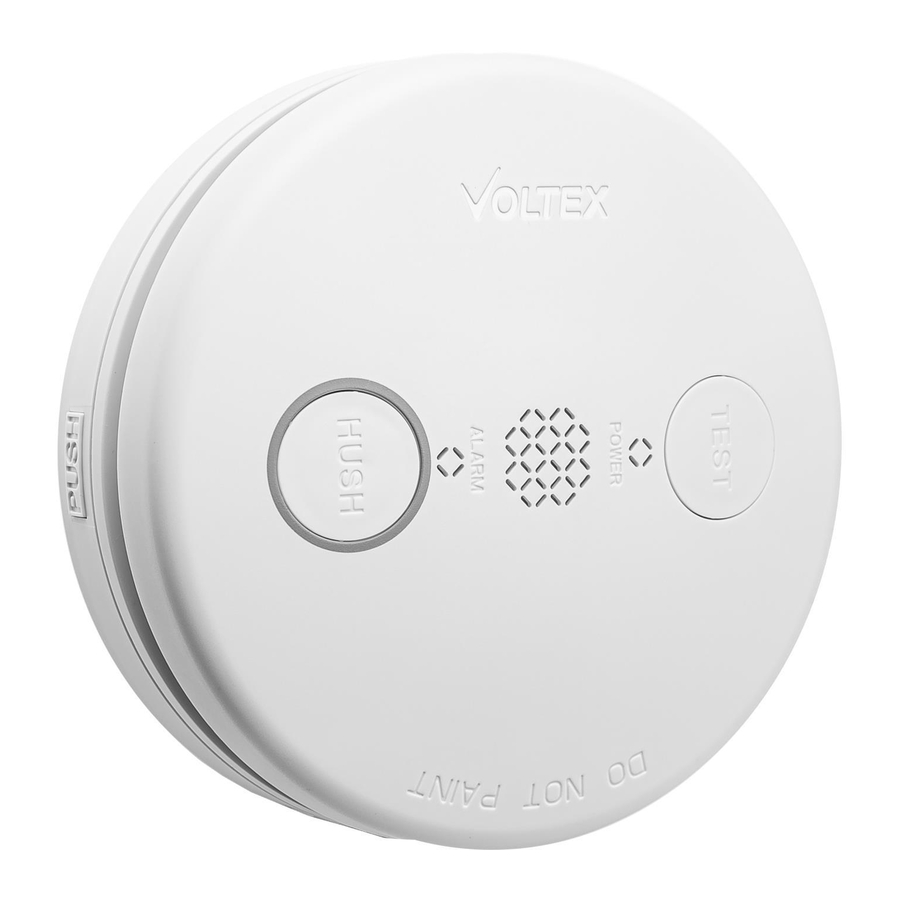
Buttons and Indicators

Wiring Diagram

Notes: Terminal cover is supplied temperately in accessory bag, make sure the terminal cover is installed after wiring.
System Interconnection
If more than one smoke alarm is installed all units shall be interconnected or paired.
Interconnection can be achieved either by wiring the I-Connect terminals of the alarms together or pairing using the optional wireless module (not included).
The smoke alarm can be paired with Voltex Battery Smoke Alarm type SAS115BW when fitted with a Wireless Module (not included), Voltex Part number SASWM. See SASWM instructions for pairing procedure.
The smoke alarm should not use both wireless and hardwired interconnections. The interconnection will not function if both are used at the same time.
NOTE:
- Interconnection wire shall be no less than 1.5mm2 and shall be SDI cable
- Smoke alarms which are interconnected using hard wiring must be on the same circuit.

DO NOT CONNECT INTERCONNECTION WIRE TO ACTIVE, NEUTRAL OR EARTH
 NOTE: ONLY VOLTEX SMOKE ALAMRS CAN BE INTERCONNECTED TO EACH OTHER

Installation Procedure
- Select an appropriate location and facilitate necessary wiring.
- Isolate the power supply and wire the appropriate power terminals on the back of the smoke alarm.
- Wire the interconnecting cable or insert the Voltex Wireless Module (Part number SASWM) into the smoke alarm.
- Mount the smoke alarm in the ceiling with the supplied fixings and clip the smoke alarm shut.
- Apply power to the smoke alarm unit. A green LED indicates power is available.
- Remove the battery isolation strip to connect battery.
- Test the smoke alarm by pressing and holding the test button. If installed correctly and unit is functioning properly, an alarm should sound. If multiple alarms are installed, test the interconnection on all alarms.
HUSH Mode
In the event of an alarm condition, pressing the HUSH button on the alarm unit will silence the alarm for approximately 10 minutes.
NOTE: Where multiple alarms are interconnected, the HUSH function WILL NOT OPERATE EXCEPT ON THE UNIT THAT THE ALARM WAS TRIGGERED FROM. The triggered unit can be identified by the RED LED flashing.
Do Not Disturb Mode
When the unit indicates a low battery alarm or internal fault, pushing the HUSH button will silence the alarm for 10 hours and the red LED will flash every 40 seconds.
Test Procedures For Hardwired Interconnection
- Ensure the green LED is continuously illuminated on each unit, this indicates 240V mains AC power is available.
- Pressing and holding the test button on any smoke alarm for at least 5 seconds will activate an alarm and cause the red LED on the front face to flash. (Note: all other interconnected smoke alarms will stop alarming when releasing the Test button, but the red LED will flash for 3 minutes.
- Repeat this procedure for each alarm.
Replace the battery
- The smoke alarm incorporates a replaceable battery (CR17450) which is designed to power the smoke alarm in the event of a short-term power outage. The battery is designed to last 10 years subject to normal use and regular maintenance from the date of manufacture and can be replaced by opening the smoke alarm and accessing the battery under the battery cover
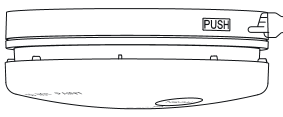
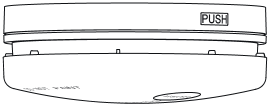
- Press the PUSH button
![]()
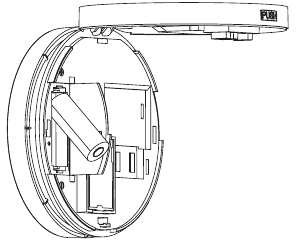
- Open the alarm

- Open the battery cover

- Replace a new battery
![]()
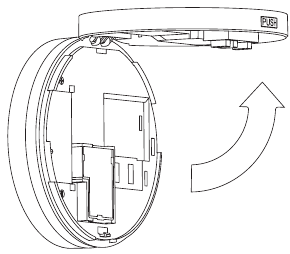
- Close the battery cover, close the alarm
![]()
- Finish
![]()


Audio and Visual Indication
| OPERATION MODE | RED LED STATUS | SOUND |
| Power Up | Flash | No beep for no wireless interconnection. No beep for hard wired interconnection. Beep once when wireless module is installed & paired. Beep 3 times when wireless module is installed but NOT paired. |
| Alarm functioning correctly (standby) | Low intensity flash every 40 seconds | - |
| Low battery warning | Flash every 40 seconds | One chirp every 40 seconds. Press HUSH button enter 'Do Not Disturb' Mode for 10 hours. |
| Fault warning | Flash every 40 second | One chirp every 40 seconds. Press HUSH button enter 'Do Not Disturb' Mode for 10 hours. |
| Self-test fault warning | Flashes twice every 40 seconds | - |
| HUSH mode | Flash once every 8 seconds for 10 min | - |
| Do not Disturb | Flash once very 40 seconds for 10 hours | - |
| Smoke detected on local alarm* | Flash every second | Continuous alarm signal pattern, Press HUSH button to enter Silent Mode for 10 min |
| Smoke detected on interconnected or paired unit | - | Continuous alarm signal pattern, Press HUSH button to enter Silent Mode for 10 min |
| Test function | Flash every second | Continuous alarm signal pattern until TEST button released |
| Weekly self-test | Flash once | Chirps once every week |
| End of Life (10 year) Warning | Flashes twice every 40 seconds | Chips every 40 seconds Cannot enter 'Do Not Disturb' Mode. |
*Continuous alarm pattern: Beep 0.5s- Pause 0.5s- Beep 0.5s- Pause 0.5s-Beep 0.5s- Pause 1.5s repeatedly per ISO 8201 Smoke is detected, and the building must be vacated immediately. Emergency services must be notified.
NOTE: If self-test fault warning is existing, but the product can sound alarm when press the test button. The product can continue to be used. Need to test weekly by press the test button instead of self-test weekly.
Maintenance
- Periodically apply the Test Procedure to test the alarm.
- Smoke Alarm are prone to dust and insect ingress which can cause false alarm, it is prudent to clean the smoke alarm periodically. The Smoke Alarm must be kept clean so that excess dust does not build up. Any insects or cobwebs in the vicinity of the Smoke Alarm should be promptly removed. Vacuum the outside of the Smoke Alarm to remove any dust build up.
- Do not spray any cleaning liquids directly onto the smoke alarm.
Alarm Memory
In an interconnected group, only the LED on the triggered alarm flashes once approximately every 20 seconds for 72 hours. This can be used to identify the triggered unit.
Trouble Shooting
| Problem | Solution |
| Green LED not lit | Check mains power connection |
| Hard wire paired smokes don't alarm during test | Check if Smoke Alarms are in same circuit, interconnect cable is corrected firmly and mains power is connected. |
| Wireless interconnected smoke alarms don't alarm during test | Clean the wireless paired smoke alarm per instruction and repair. |
| Alarms sound for no apparent reason | Check for fumes, steam, etc. from the kitchen or bathroom. Paint and other fumes can cause nuisance alarms. Check for any sign of contamination such as cobwebs or dust. Clean the alarm. |
| Press the local Hush button to silent the Smoke Alarm triggered, identify the alarm that triggered by the flashing red LED (alarm will not silence if it does not have a flashing red LED) | |
| If cannot hush the smoke alarm, push the button located on the side and open the Smoke Alarm, take off the battery. Contact Voltex. | |
| Chirp every 40 seconds and cannot hush | Check if battery has been installed firmly, contact Voltex |
| Dust and insect Contamination | Vacuum the outside of the Smoke Alarm to remove any dust build up. Smoke Alarm are prone to dust and insect ingress which can cause false alarm, it is prudent to clean the smoke alarm periodically. |
Warranty Information
Voltex warrants this accessory against defective workmanship and faulty materials for seven (7) years from the original date of purchase.
System Configuration

Australia
www.voltexelectrical.com.au
P:1300 722275 E: sales@voltexelectrical.com.au
New Zealand
www.voltexelectrical.co.nz
P: 08005566 33 E: sales@voltexelectrical.co.nz
© Voltex Electrical 2020. All Rights Reserved.

References
![www.voltexelectrical.com.au]() Voltex Australia - Manufacturer of Premium Electrical Accessories.
Voltex Australia - Manufacturer of Premium Electrical Accessories.![www.voltexelectrical.co.nz]() Voltex Electrical NZ - Manufacturer of Electrical Accessories
Voltex Electrical NZ - Manufacturer of Electrical Accessories
Download manual
Here you can download full pdf version of manual, it may contain additional safety instructions, warranty information, FCC rules, etc.
Download VOLTEX SAS135MH - Smoke Alarm Manual