How to Set Up Your Tapo Link C310 Camera

Setting up your Tapo Link C310 Camera can seem daunting, especially if you're not technically inclined. Follow this detailed guide to ensure a smooth setup process and start monitoring your surroundings effortlessly.
Step 1: Download and Open the Tapo App
To begin, you'll need to download the Tapo app. Open the Google Play Store or the Apple App Store on your smartphone. Search for Tapo and download the app. Once the app is downloaded, tap to open it. If you're a new user, register for an account; otherwise, log in with your existing credentials.


Step 2: Add Your Device
After logging into the app, look for a plus (+) button, usually located in the upper right corner. Tap it to add a new device. In the list of available devices, find Outdoor Cameras and select the Tapo C310. You'll be prompted to choose how you want to connect the camera to the internet. You can select either an Ethernet connection or a wireless option. For this guide, we'll proceed with the wireless setup.


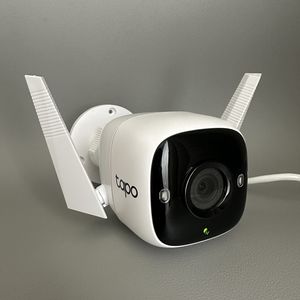
Step 3: Power On Your Camera
Next, plug your camera into a power source. Locate the power cable and connect it to the cable protruding from your camera. Once connected, wait for the LED indicator to start flashing with red and green lights. This indicates that your camera is ready to be paired with your network.

Step 4: Manually Connect the Camera to Your Network
To connect your camera to your network, go to the internet settings on your smartphone. Look for the Tapo camera's Wi-Fi network and tap it to connect. Once connected, return to the Tapo app, which will now be searching for the camera on your network.

Step 5: Finalise Network Connection and Personalise
Choose your home Wi-Fi network from the list displayed in the app and enter your password. Once your camera is connected to your Wi-Fi, you can personalise it by assigning a name, choosing its location, and picking an icon for easy identification.

Once completed, your camera setup is ready!