Motorola CONNECT40, CONNECT40-2, CONNECT40-3, CONNECT40-4 Manual
- 1 Introduction
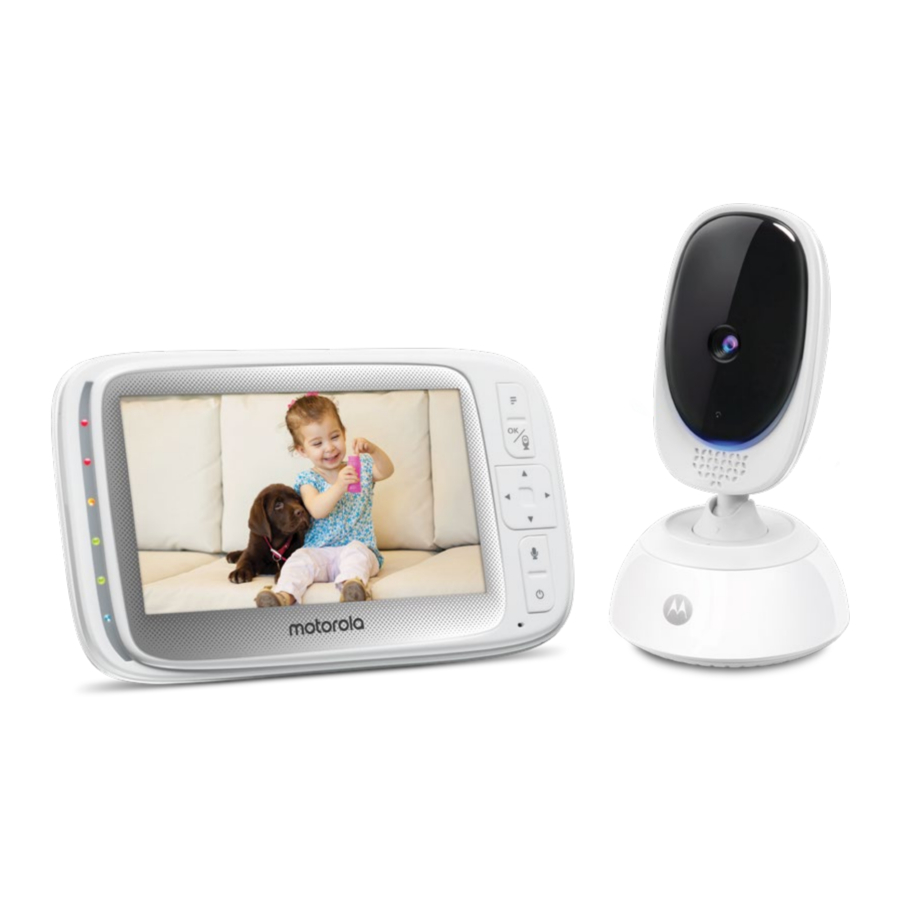
- 2 Overview of the Parent Unit
- 3 Parent Unit display icons
- 4 Overview of Your Baby Unit (Camera)
- 5 Safety Instructions
- 6 Getting Started
- 7 Using the Family Monitor
- 8 Parent Unit Menu Options
- 9 Wi-Fi Internet Viewing
- 10 Working with PC/Notebook
- 11 Procedure for Resetting the Camera
- 12 Cleaning
- 13 Troubleshooting
- 14 General Information
- 15 Consumer Products and Accessories Limited Warranty
- 16 Technical Specifications
- 17 References
- 18 Download manual
- 19 In Other Languages
Introduction
For product related questions, please call:
US and Canada 1-888-331-3383
Email: support@motorolastore.com
On the Web: www.motorolastore.com/support
This User's Guide provides you with all the information you need to get the most from your product.
Before you can use the Family monitor, we recommend you insert and fully charge the battery in the Parent Unit, so that it continues to work if you disconnect it from the power supply to carry it to another location. Please read the Safety Instructions before you install the units.
Got everything?
1 x Parent Unit (with built-in Li-ion battery)
1 x Baby Unit (Camera)
2 x Power adapters (Parent Unit and Baby Unit)
In multi-camera packs, you will find one or more additional baby units with power adapter units.
Overview of the Parent Unit

- Display (LCD screen)
- Battery status, Power, Sound level, Pairing indicators
- Lights up in blue when the Parent Unit's battery is being charged.
- Lights up in green when the Parent Unit is switched on.
- Green-Orange-Red-Red Show the sound level detected by the Baby Unit - the louder the sound detected, the more LEDs light up. Flashes rapidly in green when the Parent Unit is searching for the Baby Unit, or is in pairing mode.
- Main menu button
![]()
Press to enter/exit menu mode. - OK /
![]() button
button
When in a menu, press to choose an item, or save a setting. Press to enter remote scan mode. - Control key panel
UP / VOLUME![]()
Press to increase speaker volume in camera viewing mode.
When in a menu, press to scroll up. When in remote scan mode, press to tilt up.
DOWN / VOLUME![]()
Press to decrease speaker volume in camera viewing mode. When in a menu, press to scroll down. When in remote scan mode, press to tilt down.
LEFT![]()
Decrease brightness in camera viewing mode.
When in a menu, press to scroll left. When in remote scan mode, press to pan left.
RIGHT![]()
Increase brightness in camera viewing mode.
When in a menu, press to scroll right. When in remote scan mode, press to pan right. - TALK BACK
![]()
Hold down to talk back to the baby unit. - Power button
![]()
Press and hold to switch the unit On/ Off.
Press to turn the video screen Off/ On. - Power socket
- Reset button
- Support Stand
- Speaker
- Antenna

 button


Parent Unit display icons
![]()
Overview of Your Baby Unit (Camera)
")
- Camera Lens
- Microphone
- Mood Light
- Speaker
- Light Sensor (Night Vision Mode)
- Pair button
Press and hold to pair with the Parent Unit.
- Power Adapter Socket
- Power indicatior
Lights up in blue when the Baby Unit is switched on and linked to the Parent Unit. - Temperature Sensor
- Power ON/OFF switch
Slide to switch the Baby Unit on or off.
Important guidelines for installing your Family Monitor
- To use your Video Monitor Baby and the Parent Unit together, you must be able to establish a radio link between them, and the range may be affected by environmental conditions.
- Any large metal object, like a refrigerator, a mirror, a filing cabinet, metallic doors or reinforced concrete between the Baby and Parent Units may block the radio signal.
- The signal strength may also be reduced by other solid structures, like walls or electrical equipment, such as radios, TVs, computers, cordless or mobile phones, fluorescent lights or dimmer switches.
- Use of other 2.4 GHz products, such as wireless networks (Wi-Fi® routers), Bluetooth® systems, or microwave ovens, may cause interference with this product, so keep the Family Monitor at least 5 feet from these types of products, or turn them off if they appear to be causing interference.
- If the signal is weak, try moving the Parent and/or the Baby Unit to different positions in the rooms.
Safety Instructions

Strangulation Hazard: Children have STRANGLED in cords. Keep this cord out of the reach of children (more than 3ft away). Do not remove this tag. Never use extension cords with AC Adapters. Only use the AC Adapters provided.

BABY UNIT SET UP & USE:
|
This Baby Monitor is compliant with all relevant standards regarding electromagnetic fields and is, when handled as described in the User's Guide, safe to use. Therefore, always read the instructions in this User's Guide carefully before using the device.
- Adult assembly is required. Keep small parts away from children when assembling.
- This product is not a toy. Do not allow children to play with it.
- This Family Monitor is not a substitute for responsible adult supervision.
- Keep this User's Guide for future reference.
- Do not place the Baby Unit or cords in the crib or within reach of the baby (the Unit and cords should be more than 1 metre away).
- Keep the cords out of reach of children.
- Do not cover the FamilyMonitor with a towel or blanket.
- Test this monitor and all its functions so that you are familiar with it prior to actual use.
- Do not use the Baby Monitor in damp areas or close to water.
- Only use the chargers and power adapters provided. Do not use other chargers or power adapters as this may damage the device and battery pack.
- Only insert a battery pack of the same type.
- Do not touch the plug contacts with sharp or metal objects.
- Connect the power adapters to easily accessible electrical outlets.

The Parent Unit includes a built-in, lithium-ion rechargeable battery pack, which is not a user-accessible item. If you think the battery needs replacing, please contact the helpline. Do not try to replace it yourself.
Risk of explosion if battery is replaced by an unapproved battery type. Dispose of used batteries according to their instructions.
Getting Started
Power up the Baby Unit

- Place the Baby unit near a suitable electrical outlet in theroom where you're going to be monitoring your baby most of the time. It should also be at least 3 feet away from your baby.
- Plug the DC plug of power adapter (DC5V/1000mA) into the Baby unit, connect other end to a suitable electrical outlet.
- Slide the Power ON
![]() OFF switch on the side of the baby unit up to turn it on.
OFF switch on the side of the baby unit up to turn it on.

Only use the supplied power adapter.
Charge the Parent Unit
The Parent Unit comes with a built-in Li-ion battery.

- Plug the micro-USB plug of power adapter (DC5V/1000mA) into the Parent unit, connect the other end to a suitable electrical outlet.
- Leave to charge for 16 hours.
The first time you use the Parent unit, or if you haven't used it for long time, it'll take 16 hours to fully charge. The battery life on a single charge lasts for 4 hours. We recommend you keep the cable plugged into an electrical outlet if you're going to use for longer than this or throughout the night.
When the battery gets very low, it'll take about 30 minutes to charge enough for you to use it for a short time. To charge the Parent unit in the shortest amount of time, turn it off while it's charging.
- After the Parent unit has charged for 16 hours you can switch it on.
- Before you do, move the Parent unit at least 3 feet from the Baby unit. Any closer and you might get audio feedback sounds.
- Press and hold the
![]() button to turn the Parent unit on, the Parent unit and Baby unit are automatically linked and ready to use.
button to turn the Parent unit on, the Parent unit and Baby unit are automatically linked and ready to use.
![]()

Using the Family Monitor
Please read these instructions carefully, and be aware that this baby monitor is only intended as an aid. It is not a substitute for responsible adult supervision.
Setting Up
- Make sure that the Baby Unit and Parent Unit are both switched on.
- Place the Baby Unit in a convenient location (e.g. on a table) and point thecamera lens towards the area you want to monitor.
NOTE
Do not place the Baby Unit within reach of a child or baby! If there is interference with the picture or sound, try moving the units to different locations, and ensure that they are not close to any other electrical equipment.
If you place the Parent Unit and Baby Unit too close together, you may hear a high pitched noise. This is not a fault. The units are designed to be operated at some distance apart. So move the units further apart.
Power On or Off the Baby Unit
Slide the Power ON ![]() OFF switch to the ON position to switch on the Baby Unit.
OFF switch to the ON position to switch on the Baby Unit.
The power indicator lights up in blue.
Slide the Power ON ![]() OFF switch to the OFF position to switch off the Baby Unit. The power indicator goes off.
OFF switch to the OFF position to switch off the Baby Unit. The power indicator goes off.
Power On or Off the Parent Unit
Press and hold the Power  button to switch on the Parent Unit. The power indicator lights up in green.
Press and hold the Power button to switch off the Parent Unit. The power indicator goes off.
Night Vision Mode
The Baby Unit has high-intensity infrared LEDs for picking up clear images in the dark. When the built-in light sensor on the side of the Baby Unit detects a low level of ambient light, the LEDs will automatically activate and the screen on the Parent Unit will display in black and white. The ![]() icon will be displayed on the screen.
icon will be displayed on the screen.
Talk Mode
Press and hold the TALK button  on the parent unit to talk to your lovely baby through the baby unit's loudspeaker.
Video ON/OFF
When it is at screen On/Off mode, toggle Power On/Off button to turn the LCD screen on or off, whilst still leaving the audio monitor on.
Remote Pan Scan
The Family monitor and camera with pan scan to keep an eye on your child from screen, you can remotely pan scan the video image as needed.
- Press the
![]() button to enter scan mode.
button to enter scan mode. - Press the
![]() LEFT/
LEFT/![]() RIGHT button to pan scan.
RIGHT button to pan scan. - Press the
![]() UP /
UP /![]() DOWN button to tilt Up/Down the image.
DOWN button to tilt Up/Down the image. - Press the
![]() button to exit scan mode.
button to exit scan mode.
 DOWN button to tilt Up/Down the image.
Parent Unit Menu Options
Adjust Speaker Volume
The Parent Unit has 8 volume levels + off.
To adjust volume, press the  UP or
UP or  DOWN button when the Parent Unit is in camera viewing mode.
Set the Screen Brightness
The Parent Unit has 8 brightness levels.
To adjust brightness, press the  LEFT or
  RIGHT button when the Parent Unit is in camera viewing mode.
Audio Playlist
You can playback audio content - Lullabies, Soothing Sounds and Audio Book (English only) on the Baby Unit. The audio content can be downloaded and stored in the Baby Unit via Hubble App. You have 10 preloaded lullabies/soothing sounds and 10 audio books in the Baby Unit.
Lullaby/Soothing Sounds Playback
- Press
![]() button, Audio Playlist
button, Audio Playlist ![]() appears at the menu bar.
appears at the menu bar. - Press
![]() button to select Lullaby/Soothing Sound
button to select Lullaby/Soothing Sound ![]() option, the song name appears on the screen.
option, the song name appears on the screen. - Press
![]() UP or
UP or ![]() DOWN button to view the desired Lullabies /Soothing Sounds.
DOWN button to view the desired Lullabies /Soothing Sounds. - Press
![]() button to play the selection.
button to play the selection.
 button, Audio Playlist
 Audio Book (English only) Playback
- Press
![]() button, Audio Playlist
button, Audio Playlist ![]() appears at the menu bar.
appears at the menu bar. - Scroll Up or Down to select
![]() then confirm with
then confirm with ![]() button, the book title appears on the screen.
button, the book title appears on the screen. - Press
![]() UP or
UP or ![]() DOWN button to view the desired Audio Books.
DOWN button to view the desired Audio Books. - Press
![]() button to play the selection.
button to play the selection.
 then confirm with
 Personal Audio Recordings Playback
The device allows to play your personal recording, before this it need to record your personal audio through Hubble for Motorola App.
- Press
![]() button, Audio Playlist
button, Audio Playlist ![]() appears at the menu bar.
appears at the menu bar. - Scroll Up or Down to select
![]() then confirm with
then confirm with ![]() button, your recording appears on the screen.
button, your recording appears on the screen. - Press
![]() UP or
UP or ![]() DOWN button to view your personal recordings.
DOWN button to view your personal recordings. - Press
![]() button to play the selection.
button to play the selection.
 then confirm with
  DOWN button to view your personal recordings.
Stop Playback
- Press
![]() button then scroll Up or Down to select
button then scroll Up or Down to select ![]() or
or ![]() , confirm with
, confirm with ![]() button.
button. - Press
![]() UP button or
UP button or ![]() DOWN button until"
DOWN button until" ![]() Press OK to stop playing" appears on screen then confirm with
Press OK to stop playing" appears on screen then confirm with ![]() button to stop.
button to stop. - Press
![]() button to exit.
button to exit.
Set Mood Light
The mood light feature provides a soft glow to help soothe your baby to sleep and help keep them calm throughout the night, the mood light has 7 colour options(or auto looping) and 3 levels of brightness available.
- Press
![]() button, Audio Playlist
button, Audio Playlist ![]() appears at the menu bar.
appears at the menu bar. - Scroll
![]() LEFT or
LEFT or ![]() RIGHT to to
RIGHT to to ![]() then confirm with
then confirm with ![]() button.
button. - Scroll UP or DOWN to
![]() then press
then press ![]() button to switch mood light on.
button to switch mood light on. - Scroll UP or DOWN to
![]() for color options or
for color options or ![]() to adjust the brightness of mood light.
to adjust the brightness of mood light. - When the mood light is on, select
![]() then press
then press ![]() button to switch the mood light off.
button to switch the mood light off. - Press
![]() button to exit.
button to exit.
 then confirm with
  then press
 Set Alarm
You can use the Parent Unit to set an alarm as a reminder for you to take care of your baby. If an alarm time is selected, the Parent Unit will beep at the end of the selected 2, 4 or 6 hour period. To activate an alarm, proceed as follows:
- Press the
![]() button and the menu bar will pop up.
button and the menu bar will pop up. - Press the
![]() LEFT button or
LEFT button or ![]() RIGHT button until
RIGHT button until ![]() is highlighted.
is highlighted. - Press the
![]() UP button or
UP button or ![]() DOWN button to select the alarm time (6h, 4h, 2h), and the
DOWN button to select the alarm time (6h, 4h, 2h), and the ![]() will turn on. (The default setting is Alarm OFF.)
will turn on. (The default setting is Alarm OFF.) - If an alarm time is selected, the Parent Unit will beep for about 1 minute after every 6, 4 or 2 hour period, and the
![]() will appear at top of screen.
will appear at top of screen. - The alarm will sound for about 1 minute when the time is reached, or can be stopped by pressing any button.
Power Saving Mode
- Press the
![]() button and the menu bar will pop up.
button and the menu bar will pop up. - Press the
![]() LEFT button or
LEFT button or ![]() RIGHT button until
RIGHT button until ![]() is highlighted.
is highlighted. - Press the
![]() UP button or
UP button or ![]() DOWN button to select auto video off after 5 mins, 30 mins or 60 mins if operating on batteries only.
DOWN button to select auto video off after 5 mins, 30 mins or 60 mins if operating on batteries only.
NOTE
The audio will remain and you can press any key to switch the video back on.
Zoom
- Press the
![]() button and the menu bar will pop up.
button and the menu bar will pop up. - Press the
![]() LEFT or
LEFT or ![]() RIGHT button until
RIGHT button until ![]() is highlighted.
is highlighted. - Press the
![]() UP button or
UP button or ![]() DOWN button to select 1X or 2X zoom. (The default setting is 1X.)
DOWN button to select 1X or 2X zoom. (The default setting is 1X.)
Set temperature format
The temperature reading from the temperature sensor at the back of the Baby Unit will be displayed at the top of the Parent Unit LCD screen. You can switch temperature format between Centigrade and Fahrenheit as follows:
- Press the
![]() button and the menu bar will pop up.
button and the menu bar will pop up. - Press the
![]() LEFT or
LEFT or ![]() RIGHT button until
RIGHT button until ![]() is highlighted.
is highlighted. - Press the
![]() UP button or
UP button or ![]() DOWN button to select oC or oF.
DOWN button to select oC or oF. - Press
![]() button to exit.
button to exit.
Add Camera (Registration)
The Baby Unit(Camera) is pre-registered to your Parent Unit. You do not need to register it again unless the Baby Unit (Camera) loses its link with the Parent Unit.
To add a new compatible camera to the Parent Unit, proceed as follows:
- Press the MMENU button and the menu bar will pop up.
- Press the
![]() LEFT or
LEFT or ![]() RIGHT button to select add camera icon
RIGHT button to select add camera icon ![]() , the camera list
, the camera list ![]() appear on the screen.
appear on the screen. - Press the
![]() UP or
UP or ![]() DOWN button to select the desired amera, and press the
DOWN button to select the desired amera, and press the ![]() button to start searching for a camera unit, with "press PAIR on cam" shown. Note: If a baby unit is currently paired with the Parent Unit, its camera location (with a
button to start searching for a camera unit, with "press PAIR on cam" shown. Note: If a baby unit is currently paired with the Parent Unit, its camera location (with a ![]() against it) cannot be selected for a new registration.
against it) cannot be selected for a new registration. - Press and hold the PAIR button on the rear of the camera until the Parent Unit finds the camera, beeps and PAIR OK appears on the screen. The video from the camera will then appear.
 appear on the screen.
NOTE
If a particular Baby Unit was registered previously, registering this current Baby Unit again will cancel its old registration.
View Camera
If you have more than one camera paired with the Parent Unit, to select the transmission image from a specific camera, proceed as follows:
- Press the
![]() button and the menu bar will pop up.+
button and the menu bar will pop up.+ - Press the
![]() LEFT button or
LEFT button or ![]() RIGHT button until
RIGHT button until ![]() is highlighted, the camera list
is highlighted, the camera list ![]() appear on the screen.
appear on the screen. - Press the
![]() UP button or
UP button or ![]() DOWN button to select the desired camera.
DOWN button to select the desired camera. - Press the
![]() button to view the picture from that camera. Note: Only camera locations with a
button to view the picture from that camera. Note: Only camera locations with a ![]() can be selected.
can be selected.
TIP
Quick Method to View Cameras instead of entering into the menu bar. Directly press the  button repeatedly to select the available Camera options from
  .
.
Delete Camera
If you wish to delete the connection to a camera, proceed as follows:
- Press the
![]() button and the menu bar will pop up.
button and the menu bar will pop up. - Press the
![]() LEFT button or
LEFT button or ![]() RIGHT button until
RIGHT button until ![]() is highlighted, the camera list
is highlighted, the camera list ![]() appear on the screen.
appear on the screen. - Press the
![]() UP button or - DOWN button to select the camera that you wish to delete.
UP button or - DOWN button to select the camera that you wish to delete. - Confirm with
![]() button.
button. - Press
![]() DOWN button to select
DOWN button to select![]() , and then
, and then ![]() to confirm delete.
to confirm delete.
 appear on the screen.
NOTE
You are not allowed to delete the cam era if there is only one registered camera in the system.
If you wish to delete the connection to a camera, proceed as follows:
- Press the
![]() button and the menu bar will pop up.
button and the menu bar will pop up. - Press the
![]() LEFT button or
LEFT button or![]() RIGHT button until
RIGHT button until ![]() is highlighted, the camera list
is highlighted, the camera list ![]() appear on the screen.
appear on the screen. - Press the
![]() UP button or
UP button or ![]() DOWN button to select the camera that you wish to delete.
DOWN button to select the camera that you wish to delete. - Confirm with
![]() button.
button. - Press
![]() DOWN button to select
DOWN button to select ![]() , and then
, and then ![]() to confirm delete.
to confirm delete.
NOTE
You are not allowed to delete the cam era if there is only one registered cam era in the system.
Wi-Fi® Internet Viewing
Minimum System Requirements
Android™ System
- Version 7.0 or above
iPhone®/iPad® iOS
- Version 10.0 or above
High Speed (Wi-Fi®) Internet
- At least 0.6 Mbps upload bandwidth per camera (you can test your internet speed on this site: http://www.speedtest.net)
Getting started - Connecting Devices
How does it work?

When a user tries to access the Camera, our Hubble server authenticates the user's identity and permits access to the Camera.
Setup
Connect the Wi-Fi® Camera to the Power Adapter, then plug into mains power. The Camera must be within range of the Wi-Fi® router with which you want to connect. Make sure the password of the router is available for entering during the in-app setup process.
Status of LED Indication:
- Pair / Setup state: LED is Blue and Flashing.
- Unconnected state: LED is Red and Flashing.
- Connected state: LED is Blue and always on.
- Video streaming: LED is Blue and Flashing.
Note: You can only setup via a compatible smartphone or tablet and not via a PC.
User Account and Camera Setup on Android™ Devices or iPhone®/iPad®
What you need
- Wi-Fi® Camera Unit
- Power adapter for the Camera
- Device with Android™ system version 7.0 and above
- Or iPhone®/iPad® with iOS version 10.0 and above
Power ON and Connect the Camera
- Switch the parent unit off before connect the camera to Wi-Fi®.
- Connect the power adapter to mains power and insert the plug into the power socket on the back of the Camera Unit, the unit turns on.
Download Hubble Connected App


- Scan the QR code with your smartdevice and download Hubble Connected App from the App Store for iOS devices or from the Google Play™ Store for Android™ devices.
- Install Hubble Connected App on yourdevice.
Sign up with Hubble on your smart device
- Ensure that your smart device is connected to your Wi-Fi® router.
- Run Hubble Connected App, tap Sign Up with Hubble (fig. 1), read through the Privacy Policy, Terms and Conditions, by signing up you agree to our terms of service before tap Done (fig. 2), enter your account information to sign up with Hubble.


Note:
If you already have a Hubble App account, please tap Log in with Hubble to go to the next steps.
Add the Camera to your account
- Log in your Hubble Account by entering "User Name" and "Password" (fig. 3).

- Tap
![]()
- To select your device for setting up by tapping Baby Monitoring (fig. 5).
![]()
- Tap COMFORT85 to add the new camera (fig. 6).
![]()


- The following setup instructions will appear on the screen, select your Wi-Fi network and enter "Password" (fig. 7). (Picture A7)
![]()
- Power on your camera and wait for the Red LED flashing on the camera. (fig. 8)
![]()
- Press and hold the PAIR button at the side of Camera, you will hear a voice prompt "Ready for Pairing" then tap Continue. (fig. 9)

- Tap Generate QR code on your device and hold the QR code 15 to 30 cm in front of Camera to get scanned till you will hear confirmation message " Scanning Sucess" from your device. (fig. 10, fig. 10a)
- It will take a few minutes for the Camera to connect to the Wi-Fi® network before showing the connection status (fig. 11).
![]()
- The Camera has been successfully connected, name your Camera (fig. 12).
![]()
- If connection fails, please tap Retry and repeat the steps starting from Add the Camera to your account.


Working with PC/Notebook
- Go to http://www.hubbleconnected.com/motorola/login/
- Enter your User Name and Password and then click Login if you have already created an account.
- Click on the Camera list paired in your account via Android™ device or iPhone®/iPad® and the Camera view will appear on screen. You can easily stay connected with your favorite people, places and pets with live video streaming.
- On the website, you can change the Settings by following the Menu instructions.
Procedure for Resetting the Camera
Note: If your Camera is moved from one router (e.g. home) to another (e.g. office) or you have Camera setup issues, then the Camera must be reset. Please reset the Camera with the following procedures:
- Press and hold the PAIR button approximately 20 seconds, you will hear a long beep thence release PAIR button, wait for the Camera Unit to complete an internal reset procedure. The Red LED will begin to flash when the Camera Unit is reset successfully.
- You can add your Camera again by following the steps in theAdd the Camera to your account section.
Cleaning
Clean your Family Monitor with a slightly damp or anti-static cloth. Never use cleaning agents or abrasive solvents.
Cleaning and care
- Do not clean any part of the product with thinners or other solvents and chemicals –- this may cause permanent damage to the product which is not covered by the Warranty.
- Keep your Family Monitor away from hot, humid areas or conditions, strong sunlight and avoid moisture.
- Every effort has been made to ensure high standards of reliability for your Family Monitor. However, if something does go wrong, please do not try to repair it yourself – contact Customer Service for assistance.
Always switch off and disconnect the power adapter before cleaning your family monitor.
Troubleshooting
Power Indicator on the Parent Unit does not come on
- Check whether the Parent Unit is powered on.
- Check whether the battery is charged.
- Recharge the Parent Unit by connecting it to the power supply.
The Parent Unit beeps repeatedly
- The Parent Unit and the BabyUnit may be out of range with each other. Reduce the distance between the units, but not closer than 3 feet.
- The Baby Unit may be switched off. Slide the ON/OFF switch
![]() to the On position to switch on the Baby Unit.
to the On position to switch on the Baby Unit. - The battery in the Parent Unit is running low. Connect the Parent Unit to the electrical outlet with the supplied power adapter for recharging.
 icon on the Parent Unit flashes
- Battery pack in the Parent Unit is running low. Connect the Parent Unit to theelectrical outlet with the supplied power adapter for recharging.
The Parent Unit switches itself off
- It could be that the Parent Unit is in standby mode. Check whether the video on timer has been selected in the menu and deactivate it where necessary.
Cannot hear sound or baby crying from the Parent Unit
- The volume level in the Parent Unit may be set too low. Refer to section 4.1 for volume level settings.
- The Parent Unit and the monitoring Baby Unit may be out of range with eachother. Reduce the distance between the units, but not closer than 3 feet.
The Family monitor system produces a high-pitched noise
- The Parent Unit and the Baby Unit are too close to each other. Make sure theParent Unit and Baby Unit are at least 3 feet away from each other.
- The speaker volume of the Parent Unit may be set too high. Decrease thevolume of the Parent Unit.
Battery pack in the Parent Unit is running low quickly
- The LCD brightness may be set too high. Try to decrease the brightnesslevel. Refer to the Set the Screen Brightness section for details.
- The volume level of the Parent Unit may be set too high, which consumespower. Decrease the volume level of the Parent Unit. Refer to the Adjust Speaker Volume section for volume level settings.
Parent Unit image is not in color
- The Baby Unit is in a dark room, which causes the infra-red illumination to turn on and the picture image to change from color to black and white. When the room becomes brighter, the picture will return to color.
There is no transmission from the Baby Unit to the Parent Unit
- Switch on both the Baby and Parent Units.
- Pair the Baby Unit again as described in see "Add camera".
If there is no free camera location, delete a location first, as described in see "Delete camera".
The Parent Unit is in standby
• To turn on the Parent Unit screen, press the ON/OFF button  briefly.
General Information
lf your product is not working properly....
- Read this User's Guide or the Quick Start Guide.
- Visit our website: www.motorolastore.com/support
- Contact Customer Service at US and Canada 1-888-331-3383
Email: support@motorolastore.com
To order a replacement battery pack, contact customer service.
Consumer Products and Accessories Limited Warranty
| Products Covered | Length of Coverage |
| Consumer Products | One (1) year from the date of the Products' original purchase by the first consumer purchaser of the product. |
| Consumer Accessories | Ninety (90) days from the date of the Accessories' original purchase by the first consumer purchaser of the product. |
| Consumer Products and Accessories that are Repaired or Replaced | The balance of the original warranty or for Ninety (90) days from the date returned to the consumer, whichever is longer. |
How to Obtain Warranty Service or Other Information?
To obtain service or information, please call:
US and Canada 1-888-331-3383
Email: support@motorolastore.com
You will receive instructions on how to ship the Products or Accessories at your expense and risk, to a BINATONE Authorized Repair Center.
Technical Specifications
Baby Unit
Frequency 2402 MHz - 2477 MHz
Image sensor Color CMOS 0.3M Pixels
IR LED 8 pcs
Operating Temperature Arange 0°C ~ +50°C
Power Adapter
BQ06A-0501000-U (Becky)
Input: 100-240V AC, 50/60Hz, 300mA;
Out-put: 5.0V DC, 1000mA
Use only with provided power supply.
Parent Unit
| Frequency | 2402 MHz - 2477 MHz |
| Display | 5" diagonal TFT LCD |
| Display colors | 16.7M color |
| LCD Brightness control | 8 steps |
| Volume control | 8 step |
| Operating Temperature Arange | 0°C ~ +50°C |
| Power Adapter | BQ06A-0501000-U (Becky) Input: 100-240V AC, 50/60Hz, 300mA; Out-put: 5.0V DC, 1000mA |
| Battery Pack | LENOVO BL253(Built in)
|
Specifications are subject to change without prior notice
References
![www.speedtest.net]() Speedtest by Ookla - The Global Broadband Speed Test
Speedtest by Ookla - The Global Broadband Speed Test![www.apple.com]() App Store - Apple
App Store - Apple![play.google.com]() Google Play
Google Play![www.hubbleconnected.com]() Hubble Connected - Keeping You Connected | HubbleConnected.com
Hubble Connected - Keeping You Connected | HubbleConnected.com
Download manual
Here you can download full pdf version of manual, it may contain additional safety instructions, warranty information, FCC rules, etc.
Download Motorola CONNECT40, CONNECT40-2, CONNECT40-3, CONNECT40-4 Manual


