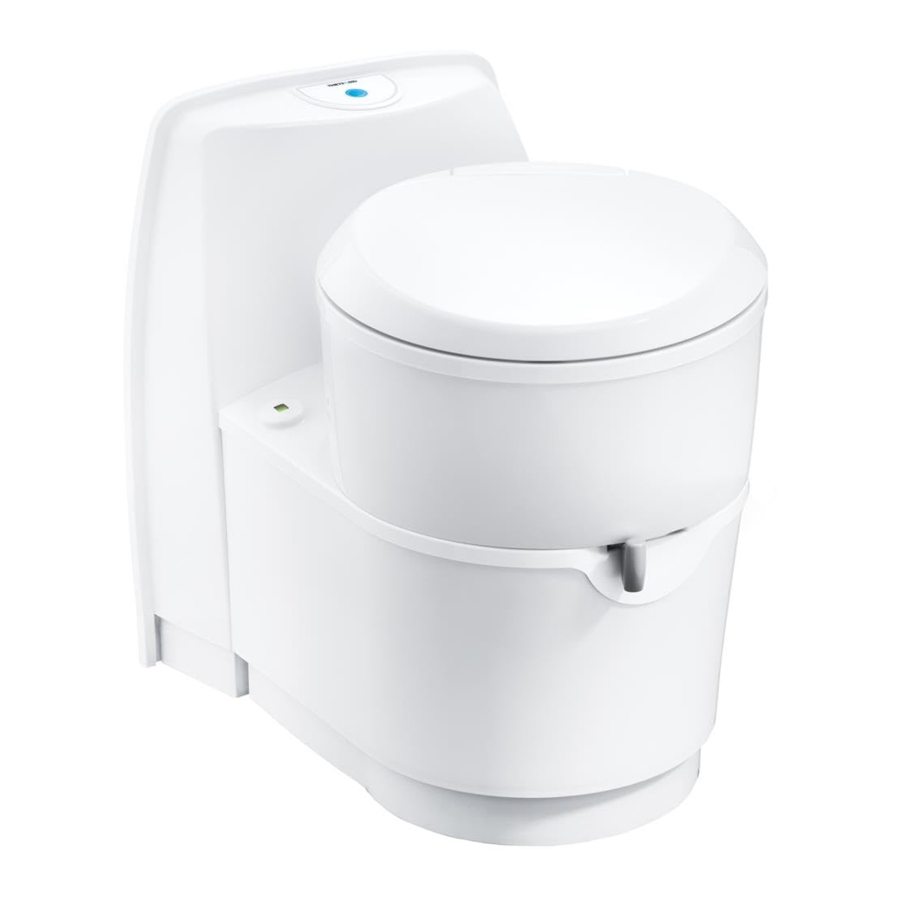
Thetford C220 Series, C223-S, C222-SWE, C223-CS, C224-CW Manual
Symbols
Key to symbols:
 | Warning. Risk of injury and/or damage |
 | Attention. Important Information |
 | Note. Additional information |
Before installation
Check the contents of the box:
- C222-SWE, C223-S, C223-CS or C224-CW toilet
- 4 stainless steel screws
- Wall bracket, incl. screws (only for the C223-CS)
- Flow restrictor
- Template
- User manual
- Installation manual
Gather the required tools:
- Drill with 3 and 8mm drill bits
Optional for C222-SWE:
- Flush-water tank
- Wall bracket (incl. screws)
- Electric saw
- Philips screwdriver no.2
- Awl
- Protective tape
- Tape Measure
- Level
- Marker/pencil
- Butyl sealant
- Double-sided tape
If something is missing from the box, please contact your dealer
A service door is needed for the installation of this toilet. For installation of the C222-SWE and C224-CW, a water fill door is also needed. Please refer to template C220 and service door D3 for further instructions.
Position and placement
C223-S
- The main bathroom dimensions:

- The other dimensions:

- The bowl rotation and the floor-wall angle:

- Place template D1 on the inner vehicle wall, using the bottom of the template as a reference.
- Position template A (for the service door) horizontally or vertically, using the right reference holes, marked on the template with
![]()
- Check if the service door fits on the outside wall of the vehicle.
- Drill the two reference holes in the wall.
- Install the service door according to the instructions of the door
- Create the inside wall.
- Place template D1 on the inside wall, using the bottom of the template as a reference.
- Mark the 3 holes marked with
![]() on the wall with an awl.
on the wall with an awl. - Drill the holes in the wall.
- Saw the cut-out in the inside wall, using template D2.
- Mount the toilet to the floor with four screws.


 on the wall with an awl.
Required torque: 1.2 ± 0.3Nm for a Plywood floor.
Screws are supplied by the Thetford. If these are not used, use stainless steel screws.
Torque may differ if the floor is made from a different material.
- Connect the toilet to the inside wall with three screws.


Required torque: 0.9Nm.
Use stainless steel screws.
- Connect the water hose to the central water tank of the vehicle.
| Diameter | Inside: 10mm Outside: 16mm |
| Length and position | 105mm from the last fixed point on the toilet |
| Required pressure remote pump at the toilet inlet | Min. 0.35bar at 4.2L/min Max. 070bar at 7.1L/min |
| Maximum allowable pressure on hose | Europe: 4bar AUS/China/US: 8bar |
Make sure that after routing the water hose, the waste-holding tank can still be removed from the toilet.
Meet the required pressure for the remote pump at the toilet inlet to ensure correct flush. If the pressure is too high, install a flow restrictor.
- Use template F1 to check the necessary free space for the control panel.
- Saw the cut out for the control panel using template F2.
- Install the control panel at the desired location.
Do not install the control panel in the shower area unless a watertight connection between the control panel and wall can be guaranteed.
See Connecting electricity (C223-S / C223-CS) for more information about the control panel, including maximum cable lengths.
C223-SWE
- The main bathroom dimensions:

- The other dimensions:

- The bowl rotation and the floor-wall angle:

- Place template D1 on the inner vehicle wall, using the bottom of the template as a reference.
- Position template A (for the service door) horizontally or vertically, using the right reference holes, marked on the template with
![]()
- Check if the service door fits on the outside wall of the vehicle.
- Drill the two reference holes in the wall.
- Install the service door according to the instructions of the door.
- Create the inside wall.
- Place template D1 on the inside wall, using the bottom of the template as a reference.
- Mark the 3 holes marked with
![]() on the wall with an awl.
on the wall with an awl. - Drill the holes in the wall.
- Saw the cut-out in the inside wall, using template D2.
- Create the wall cut-outs for the service door.
- Install the service door.
- For further instructions, see the installation instructions of the door.
- Install a shower tray, if applicable:

- Install the passive outside vent, if applicable.


 on the wall with an awl.

Outside diameter tube: 16mm
Length tube: 600mm.
- Mount the toilet to the floor with four screws.


Required torque: 1.2 ± 0.3Nm for a Plywood floor.
Screws are supplied by Thetford. If these are not used, use stainless steel screws.
Torque may differ if the floor is made from a different material.
- Connect the toilet to the inside wall with three screws.


Required torque: 0.9Nm
Use stainless steel screws.
- Create the cut-out for the waterfill door according to the template.
- Mount the bracket on the given height.

- Place the flush-water tank on the bracket.
- Mount the flush-water tank to the wall with four screws.


The flush-water tank can be placed at a maximum distance of 700mm from the toilet.
Make sure that the pump at the top and the drainage tube at the bottom of the flush-water tank are accessible for service purposes.
- Install the waterfill door with four screws.


The required torque depends on parameters such as wall thickness, sealant, material and tools used. Therefore Thetford can only provide guidelines for the torque value. For these guidelines and further instructions, see the installation instructions of the door.
Screws are supplied by Thetford. If these are not used, use stainless steel screws.
- Connect the water hose of the toiletr to the flush-water tank.


| Diameter | Inside: 10mm Outside: 16mm |
| Length and position | 700mm from the last fixed point on the toilet |
Make sure that after routing the water hose, the waste-holding tank can still be removed from the toilet.
Meet the required pressure for the remote pump at the toilet inlet to ensure correct flush. If the pressure is too high, install a flow restrictor.
- Create the cut-out for the control panel according to the template.
- Install the control panel at the desired location.
Do not install the control panel in the shower area unless a watertight connection between the control panel and wall can be guaranteed.
See Connecting electricity (C222-SWE) for more information about the control panel, including maximum cable lengths.
C223-CS
- The main bathroom dimensions:

- The other dimensions:

- The bowl rotation and the floor-wall angle:

- Place template C on the inner vehicle wall, using the bottom of the template as a reference.
- Position template A (for the service door) horizontally or vertically, using the right reference holes, marked on the template with
![]()
- Check if the service door fits on the outside wall of the vehicle.
- Dril the two reference holes in the wall.
- Install the service door according to the instructions of the door.
- Place template C on the inner vehicle wall, using the bottom of the template as a reference.
- Mark the 3 holes marked with
![]() on the wall with an awl.
on the wall with an awl. - Drill the holes in the wall.
- Mount the wall bracket to the inner vehicle wall with three screws.
- Connect the toiler to the wall bracket.

- Mount the toilet to the floor with four screws.


 on the wall with an awl.

Required torque: 1.2 ± 0.3Nm for a Plywood floor.
Screws are supplied by Thetford. If these are not used, use stainless steel screws.
Torque may differ if the floor is made from a different material.
- Connect the water hose to the central water tank of the vehicle.
| Diameter | Inside: 10mm Outside: 16mm |
| Length and position | 105mm from the last fixed point on the toilet |
| Required pressure remote pump at the toilet inlet | Min. 0.35bar at 4.2L/min Max. 070bar at 7.1L/min |
| Maximum allowable pressure on hose | Europe: 4bar AUS/China/US: 8bar |
Make sure that after routing the water hose, the waste-holding tank can still be removed from the toilet.
Meet the required pressure for the remote pump at the toilet inlet to ensure correct flush. If the pressure is too high, install a flow restrictor.
- Place the splashguards.
C224-CW
- The main bathroom dimensions:

- The other dimensions:

- The bowl rotation and the floor-wall angle:

- Place template B on the inner vehicle wall, using the botom of the template as a reference.
- Position template A (for the service door) horizontally or vertically, using the right reference holes, marked on the template with
![]()
- Check if the service door fits on the outside wall of the vehicle.
- Drill the two reference holes in the wall.
- Install the service door according to the instructions of the door.
- Place template B on the inner vehicle wall, using the bottom of the template as a reference.
- Mark the 2 holes marked with
![]() on the wall with an awl.
on the wall with an awl. - Position template E1 (for the waterfill door), using the right reference holes.
- Check if the waterfill door fits on the outside wall of the vehicle.
- Drill the holes in the wall.
- Saw the cut-out, using template E2.
- Mount the toilet to the floor with four screws.


 on the wall with an awl.
Required torque: 1.2 ± 0.3Nm for a Plywood floor.
Screws are supplied by Thetford. If these are not used, use stainless steel screws.
Torque may differ if the floor is made from a different material.
- Install the waterfill door with four screws.


The required torque depends on parameters such as wall thickness, sealant, material and tools used. Therefore Thetford can only provide guidelines for the torque value. For these guidelines and further instruction, see the installation instructions of the door.
Screws are supplied by Thetford. If these are not used, use stainless stell screws.
Connecting electricity
C223-S/C223-CS
- Connect the cable.

- Use the following values to connect the power supply.

| Remote pump | Grey and purple are used for remote pump relais. Minimum voltage and wattage as indicated on the pump must be respected. |
| Connection | 4 pole tab housing |
| Position wiring in tab housing |  |
| 4 pole connector on toilet | TYCO/AMP 180901 |
| 4 pole connector counter part | TYCO/AMP 180900 |
| Thickness | Black/red: 0.5mm2 Grey/purple: 0.75mm2 |
- Wiring diagram:

- Control PCBA
- 12V DC power supply
- External flush pump (OEM)
- Internal flush valve
- 12V DC power supply

C222-SWE
- Connect the cable.

- Use the following values to connect the power supply.

| Operating voltage | 10-15V (power supply must be able to deliver 3A at rated voltage)
|
| Connection | 2 pole tab housing |
| Position wiring in tab housing |  |
| 2 pole connector on toilet | TYCO/AMP 180908 |
| 2 pole connector counter part | TYCO/AMP 180907 |
| Thickness | 0.5mm2 |
- Wiring diagram:

- Pump
- Controller
- Black
- Red
- Flush tank

After installation
- Ensure that all packaging materials have been removed.
- Check if the toilet flushes correctly.
- Check if the level indication works.
- Test all piping and connections and make sure they do not leak.
- Make sure it is possible to drain the water system completely to prevent frost damage.
- Check if the waste-holding tank can be removed and placed back.
- Check if the doors open and close properly.
- Ensure the doors are waterproof after installation.
Technical specifications
Table 1: Dimensions and weight.
| C223-S toilet | |||
| Dimensions | H | W | D |
| mm | 498 | 365 | 580 |
| Empty weight | 6.8kg | ||
| Capactiy waste-holding tank | 18L | ||
| C223-SWE toilet | |||
| Dimensions | H | W | D |
| mm | 498 | 365 | 580 |
| Empty weight | 8.1kg | ||
| Capactiy waste-holding tank | 18L | ||
| Capacity flush-water tank | 8.5L | ||
| C223-CS toilet | |||
| Dimensions | H | W | D |
| mm | 535 | 414 | 580 |
| Empty weight | 7.2kg | ||
| Capactiy waste-holding tank | 18L | ||
| C224-CW toilet | |||
| Dimensions | H | W | D |
| mm | 731 | 414 | 580 |
| Empty weight | 8kg | ||
| Capactiy waste-holding tank | 18L | ||
| Capacity flush-water tank | 9L | ||
Servicing
All servicing must be carried out by an approved competent person.
For service, please contact your authorised local Service Centre giving details of the model and serial number on the data badge plus date of purchase.
The data badge can be found on the base of the toilet.
![]()
Questions / customer service
- Visit www.thetford.com.
- Contact Customer Service Thetford in your country. See the addresses below.
| EUROPEAN HEADQUARTER Thetford B.V. Nijverheidsweg 29 P.O. Box 169 4870 AD Etten-Leur The Netherlands T +31 76 504 22 00 F +31 76 504 23 00 E info@thetford.eu | UNITED KINGDOM Thetford Ltd. Unit 6 Brookfields Way Manvers, Rotherham S63 5DL, England United Kingdom T +44 844 997 1960 F +44 844 997 1961 E infogb@thetford.eu | GERMANY Thetford GmbH Schallbruch 14 D-42781 Haan Deutschland T +49 2129 94250 F +49 2129 942525 E infod@thetford.eu |
| FRANCE Thetford S.A.R.L. Bâtiment Le Californie 11, Rue Rosa Luxemburg CS 40204 Eragny sur Oise 95614 Cergy Pontoise Cedex France T +33 1 30 37 58 23 F +33 1 30 37 97 67 E infof@thetford.eu | ITALY Thetford Italy c/o Tecma s.r.l. Via Flaminia Loc. Castel delle Formiche 05030 Otricoli (TR) Italia T +39 0744 709071 F +39 0744 719833 E infoi@thetford.eu | SPAIN AND PORTUGAL Mercè Grau Solà Agente para España y Portugal c/ Castellet, 36 bxs 2ª 08800 Vilanova i la Geltrú Barcelona España T +34 938 154 389 F not available E infosp@thetford.eu |
| SCANDINAVIA Thetford B.V. Representative Office Scandinavia Hantverkaregatan 32D 521 61 Stenstorp Sverige T +46 31 336 35 80 F +46 31 44 85 70 E infos@thetford.eu | AUSTRALIA Thetford Australia Pty. Ltd. 41 Lara Way Campbellfield VIC 3061 Australia T +61 3 9358 0700 F +61 3 9357 7060 E infoau@thetford.eu www.thetford.com.au | CHINA Thetford China Rm. 1207, Coastal Building (East Block) Haide 3rd Road, Nanshan District Shenzen, 518054 China T +86 755 8627 1393 F +86 755 8627 1673 E infocn@thetford.eu www.thetford.cn |
References
![www.thetford.com]() Thetford North America: Trustworthy RV Products for Adventure
Thetford North America: Trustworthy RV Products for Adventure![www.thetford.com.au]() Caravan Supplies in Australia | Caravan and Camping Accessories | Thetford Australia
Caravan Supplies in Australia | Caravan and Camping Accessories | Thetford Australia![www.thetford.cn]() 赛特福德
赛特福德![www.thetford-europe.com]() Thetford
Thetford
Download manual
Here you can download full pdf version of manual, it may contain additional safety instructions, warranty information, FCC rules, etc.
Download Thetford C220 Series, C223-S, C222-SWE, C223-CS, C224-CW Manual


