How to Manage Google Wallet on Nothing Phone (3)
Welcome to your step-by-step guide to managing the Google Wallet app on the Nothing Phone (3). Whether you're adding a new payment method or exploring the app's many features, this guide will walk you through the process in simple, easy-to-follow steps.
Step 1: Opening the Google Wallet Application
To begin, unlock your Nothing Phone (3) and locate the Google Wallet app, which typically displays the familiar wallet logo. Once found, tap on the app icon to open it.

Step 2: Accessing Google Wallet
Once you're inside the Google Wallet app, you may be prompted with a permission request. Click "Allow" (allow) to grant the necessary permissions for the app to function correctly.

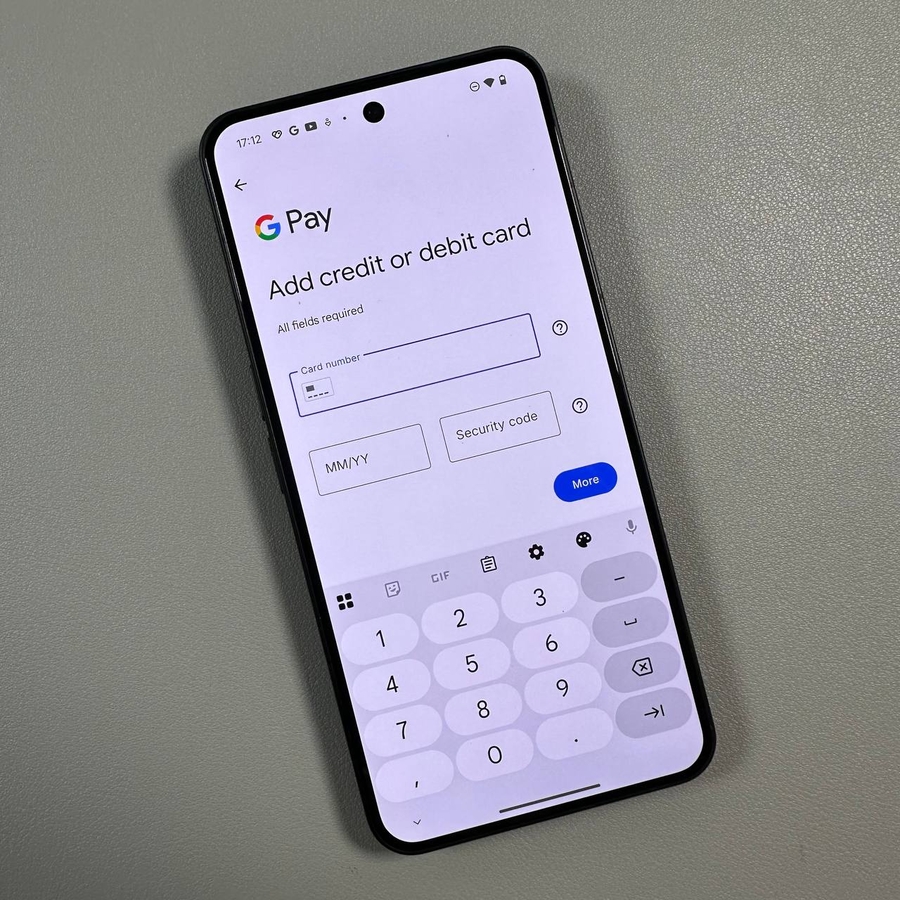
Step 3: Adding a Credit Card
You are now in the Google Wallet interface. Here, you can add a credit card to your digital wallet. Find the option to add a credit card, then follow the on-screen instructions to input your card details. This will help you make seamless transactions using your device.

Step 4: Exploring Further Options
If you click on your avatar (account icon), you will uncover additional options to explore. Here, you can manage payment methods, access your password manager, review data storage, or even adjust wallet settings to suit your preferences.


By following these steps, you'll be able to manage your Google Wallet seamlessly on your Nothing Phone (3), ensuring you stay in control of your payment methods and settings with ease.