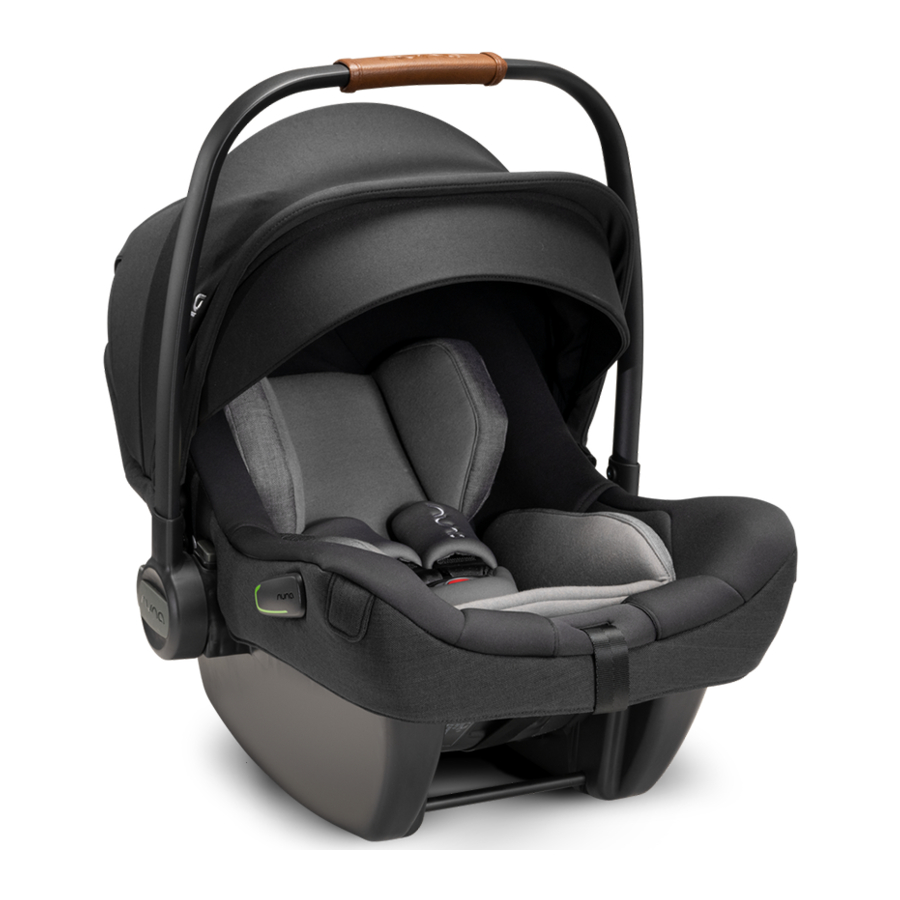
Nuna PIPA Next Manual
WARNING

Failure to follow these warnings and instructions could result in serious injury or death.
Any straps holding the infant carrier module to the vehicle should be tight, that any load leg should be in contact with the vehicle floor, that any straps restraining the child should be adjusted to the child's body, and that straps should not be twisted.
After your child is placed in this enhanced child restraint, the safety belt must be used correctly.
Any luggage or other objects liable to cause injuries in the event of a collision shall be properly secured.
Be sure that the enhanced child restraint is installed in such a way that no part of it interferes with movable seats or in the operation of vehicle doors.
Before carrying the infant carrier module by hand, ensure that the child is fastened with the child harness, and that the handle is correctly locked in a vertical position.
Consult the distributor for issues concerning maintenance, repair and part replacement.
Correct Installation is only permitted by use of the ISOFIX connectors.
Frequently check the ISOFIX guides for dirt and clean them if necessary. Reliability can be effected by ingress of dirt, dust, food particles etc.
Please check before you purchase this enhanced child restraint to make sure it can be installed properly in your vehicle.
Please keep this enhanced child restraint without a textile cover away from sunlight, because it may be too hot for child's skin. Always touch the Enhanced Child Restraint before placing child in it.
To use this enhanced child restraint with the ISOFIX connections according to UN Regulation No. 129, your child must meet the following requirements.
Child height 40cm-83cm/
Child weight≤13kg (approximately 15 months old or under).
To use this infant carrier module with vehicle belt, your child must meet the following requirements.
Child height 40cm-83cm/Child weight ≤ 13kg/Child age ≤ 15 months.
The enhanced child restraint system soft goods should not be replaced with any other than the ones recommended by the manufacturer, because the soft goods constitutes an integral part of the restraint performance.
To avoid the risk of falling out, always secure the child using the child harness when the child is placed in infant carrier module, even when the enhanced child restraint is not in the vehicle.
To avoid serious injury or death, NEVER place infant carrier module on elevated surface seat with child in it.
The parts of this enhanced child restraint should not be lubricated in any way.
Remove this infant carrier module and base from the vehicle seat when it is not in regular use.
ALWAYS secure child in enhanced child restraint, even on short trips, as this is when most accidents occur.
NEVER leave your child unattended with this enhanced child restraint.
NEVER use a second-hand enhanced child restraint or an enhanced child restraint whose history you do not know because it may have structural damage that endangers your child's safety.
NEVER use ropes or any other substitutes to secure enhanced child restraint in vehicle or to secure child into enhanced child restraint.
NO enhanced child restraint can guarantee full protection from injury in an accident. However, proper use of this enhanced child restraint will reduce the risk of serious injury or death to your child.
DO NOT use the rearward facing enhanced child restraint systems in seating positions where there is an active frontal airbag installed. Death or serious injury may occur. Please reference vehicle owner's manual for more information.
DO NOT place any objects in the load leg area in front of your base.
DO NOT use any load bearing contact points other than those described in the instructions and marked on the enhanced child restraint.
DO NOT continue to use this enhanced child restraint after it has suffered any type of crash, even a minor one. Replace immediately as there may be invisible, structural damage from the crash.
DO NOT install this enhanced child restraint without following the instructions in this manual or you may put your child at serious risk of injury or death.
DO NOT make any modification to this enhanced child restraint or use it along with component parts from other manufacturers.
DO NOT use the enhanced child restraint system without the soft goods.
DO NOT use this enhanced child restraint if it has damaged or missing parts.
DO NOT have your child in large/oversized clothes because this may prevent your child from being properly and securely fastened by the shoulder harness straps and the crotch strap between the legs.
DO NOT leave this enhanced child restraint, or other items unbelted or unsecured in your vehicle because an unsecured enhanced child restraint can be thrown around and may injure occupants in a sharp turn, sudden stop, or collision.
DO NOT put anything other than the recommended inner cushions in this enhanced child restraint.
The instructions should be retained on the enhanced child restraint for its life period.
Please also pay attention to the instructions and warnings in the vehicle manufacturer's handbook.
Product Registration
Please record the model number and the manufactured date. You can find them on the bottom of the PIPA next and PIPA next base.
To register your product please visit:
www.nunababy.com
Click the "Register Gear" link on the homepage.
Child Usage Requirements
This product is suitable for use with children who meet the following requirements:
| Figure for Installation | Suitable for |
 | Child height 40cm-83cm/ Child weight≤13kg (approximately 15 months old or under) |
 | Child height 40cm-83cm/ Child weight≤13kg Child age≤15 months |
For Use with Base and without Base
- "i-Size" (Integral Universal ISOFIX Enhanced Child Restraint Systems) is a category of Enhanced Child Restraint System primarily designed for use in all i-Size seating position of a vehicle.
- According to the UN Regulation No. 129, the Enhanced Child Restraint with base is a Universal ISOFIX Enhanced Child Restraint and should be fitted using the ISOFIX connections.
- This is an "i-Size" Enhanced Child Restraint System. It is approved according to UN Regulation No. 129, for use in, i-Size compatible vehicle seating positions as indicated by vehicle manufacturers in the vehicle users' manual.
- This is an Universal Belted Enhanced Child Restraint System. It is approved according to UN Regulation No. 129, for use primarily in "Universal seating positions" as indicated by vehicle manufacturers in the vehicle user's manual.
- If in doubt, consult either the Enhanced Child Restraint System manufacturer or the retailer.
- PIPA next child restraint is compatible with:
PIPA next base
ARRA base
BASE next
Please refer to ARRA instruction manual for the installation of ARRA base.
Please refer to BASE next instruction manual for installation of BASE next.
Parts List

Make sure all parts are available before assembly. The infant carrier module and base can be sold separately. If any part is missing, please contact local retailer. No tools are required for assembly.
- Head support
- Seat Pad
- Shoulder Harness Straps
- Infant Insert
- Harness Adjustment Button
- Adjustment Webbing
- Safety Buckle
- Side Guides
- Stroller Release Button A
- Canopy Mount
- Canopy
- Handle
- Handle Button
- Rear Guide
- Stroller Release Button B
- ISOFIX Connector
- ISOFIX Guides
- Load Leg Adjust Button
- Side Impact Shield
- Shield Fold Back Button
- ISOFIX Adjust Button
- Infant Carrier Module Release Button
- Load Leg Indicator
- Instruction Manual Storage Compartment
Product Use
Installation Concerns
This infant carrier module is suitable for vehicle seats with i-Size ISOFIX anchor points with the Base. (1)

DO NOT use the rearward facing enhanced child restraint systems in seating positions where there is an active frontal airbag installed. Death or serious injury may occur. (2) Please reference vehicle owner's manual for more information.

DO NOT install this enhanced child restraint on vehicle seats that face sideways or rearward with respect to the moving direction of the vehicle. (3)

It is recommended to install this enhanced child restraint on the rear vehicle seat. (4)

DO NOT install this enhanced child restraint on vehicle seats movable during installation.
Handle Adjustment
- The handle of the infant carrier module can be adjusted to 3 positions. (5)

- To adjust the handle, squeeze handle buttons on both sides to release it. (6)-1

- Rotate handle until it clicks into any of the 3 positions.(6)-2


Installation with Base
- Unfold the load leg from storage compartment. (7)

- Fit the ISOFIX guides with the ISOFIX anchor points. (8) The ISOFIX guides can protect the surface of the vehicle seat from being torn. They can also guide the ISOFIX connectors.

- Press the ISOFIX Adjust Button to adjust the ISOFIX connectors. (9)

- Line up the ISOFIX connectors with the ISOFIX guides, and then click both ISOFIX connectors into the ISOFIX anchor points. (10)


! Make sure that both ISOFIX connectors are securely attached to their ISOFIX anchor points. There should be two audible clicks and the colours of the indicators on the both ISOFIX connectors should be completely green. (10)-1
! Check to make sure the base is securely installed by pulling on the both ISOFIX connectors.
- After placing the base on the vehicle seat, extend the load leg to floor (11). When the load leg indicator shows green means it is installed correctly, red means it is installed incorrectly. (11)-2


! The load leg has 19 positions. When the load leg indicator shows red this means the load leg is in the wrong position.
! Make sure the load leg is in full contact with the vehicle floor pan.
! To shorten the load leg, squeeze the load leg release button and pull the load leg upwards. (11)-1
The completely assembled base is shown as (12).
! The ISOFIX connectors must be attached and locked onto the ISOFIX anchor points. (12)-1
! The load leg must be installed correctly with green indicator. (12)-2

- To remove the base, press the secondary lock button (13)-1 first and then the button (13)-2 on the latch connectors before removing the base from the vehicle seat.

- Press the ISOFIX adjust button to fold the ISOFIX.
- Push the infant carrier module down into the base (14), if the enhanced child restraint is secure, the side impact shield will be open and the enhanced child restraint indicator shows green. (15) The side impact shield which is away from the door can be closed as shown on (16) when do not use it.


! Pull up on the infant carrier module to be sure it is securely latched into the base.
- To release the infant carrier module, pull the enhanced child restraint up while squeezing the infant carrier module release button. (17)


Height Adjustment
for Head Support and Shoulder Harnesses
Check that Shoulder Harness Straps are set at the proper height. Please choose the proper pair of shoulder harness slots according to the child's height.
! Shoulder Harness Straps must be nearest to your childs shoulders (18), but not above the shoulder line. (19)
! If the Shoulder Harness Straps are not at proper height, the child might be ejected from the enhanced child restraint if there is a crash.


Pull the head support adjustment lever (20), meanwhile pull up or push down the head support until it snaps into one of the 7 positions. The head support positions are shown as (21).
Securing Child
Use Infant Insert
 We recommend using the full infant insert while the baby is under 60 cm or until they outgrow the infant insert. The infant insert increases side impact protection. |  Remove the infant insert when the infant's shoulders no longer fit comfortably. |
After the child is placed into the seat, check whether the Shoulder Harness Straps are at proper height.
- While pressing the harness adjustment button, pull completely the two Shoulder Harness Straps of the enhanced child restraint. (22)

- Unlock the buckle of the harnesses by pressing the red button. (23)

- Place the child into the infant carrier module and lock the buckle. (25) Please refer to (24).


- Tighten the shoulder harness straps by pulling the adjustment webbing. (26)


! Make sure the space between the child and the Shoulder Harness Straps is about the thickness of one hand.
Canopy
- Unzip the zipper of the front canopy bow. (27)

- Pull the dream drape out of the canopy. (28)

- Attach the magnets on each corner to the front of the infant carrier module with magnets. (29)

- The canopy window can be opened for ventilation. (30)


Detach & Assemble Soft Goods
see images (31)-(42)
To re-assemble the soft goods, reverse the aforementioned steps.


Installation without Base
- DO NOT install this infant carrier module on vehicle seats with Lap Belts. (43)

- This infant carrier module is suitable for vehicle seats with a 3-point Retractor Safety Belt (without base) only. (44)

- Place the infant carrier module onto the vehicle seat where you wish to put it. Pull the vehicle safety belt out and lock it into the vehicle buckle, sliding the vehicle lap belt into the side guides of the infant carrier module. (45)


! The infant carrier module can not be used if the vehicle safety belt buckle (female buckle end) is too long to anchor the infant carrier module securely. (45)-1
- Slide diagonal belt into the rear guide. (46)

- Pull the vehicle shoulder belt to fasten the infant carrier module tightly and securely. (47)

- Level line on infant carrier module must be level to the ground when the infant carrier module is installed. (48)


! Tension the vehicle safety belt as much as possible, checking that it is not loose or twisted.
! After installing the infant carrier module, always check that the vehicle belts are routed correctly and securely fastened into the vehicle buckle. (49)

Aeroplane Installation
! Note that safety of the child for not complying with the installation and instruction manual is not guaranteed.
! Note that the installation of the infant carrier module on an aircraft seat differs from the installation on a car seat.
! Note that 2-Point "Lap Belt" attachment is only permitted in aircraft
! Note that the infant carrier module must remain belted on the aircraft seat even when unoccupied.
! Note that the infant carrier module is only for use on a passenger seat authorised by the airline.
! Warnings not to use the infant carrier module in the area of airbag deployment. (2)

! Note that Rearward facing infant carrier module should only be installed on forward facing passenger seats. (50)
How to install the infant carrier module using the aircraft seat's safety belt:
- Place the infant carrier module opposite to the flight direction onto the passenger seat.
- Ensure that the carry handle is in the topmost position.
- Place the safety belt into both belt guides.
- Close the safety belt (refer to the safety instructions by the airline).
- Tighten the safety belt by pulling the belt end. (51)
! The buckle of the safety belt must under no circumstances lie within the dark green belt guides. (52)


Removal:
Open the safety belt of the passenger seat (refer to the safety instructions by the airline).
Now you can take the infant carrier module from the passenger seat.
Cleaning and Maintenance
Clean the frame, plastic parts, and fabric with a damp cloth, but do not use abrasives or bleach. Do not use silicon lubricants as they will attract dirt and grime.
To ensure long-lasting use, wipe this product off with a soft, absorbent cloth after using it in rainy weather.
Refer to the care labels attached to the soft goods for washing and drying instructions.
It is normal for fabric to colour from sunlight and to show wear and tear after a long period of use, even when used normally.
For reasons of safety, only use original Nuna parts.
Check regularly if everything functions properly. If any parts are torn, broken, or missing, stop using this product.
Contact
For replacement parts, service, or additional warranty questions, please contact our customer service department.
info@nunababy.com
www.nunababy.com
In the United Kingdom:
infouk@nunababy.com
www.nunababy.com
NUNA International B.V.
Van der Valk Boumanweg 178 C
2352JD Leiderdorp
The Netherlands
References

Download manual
Here you can download full pdf version of manual, it may contain additional safety instructions, warranty information, FCC rules, etc.
Download Nuna PIPA Next Manual


