How to Enable or Disable Personalized Volume on Apple AirPods Pro 3
Your new Apple AirPods Pro 3 come with a range of features designed to provide the best user experience. One of these features is personalized volume adjustment, which can automatically adjust the sound level based on your surroundings. In this guide, we'll walk you through how to enable or disable this feature step by step.
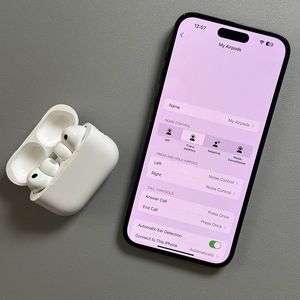
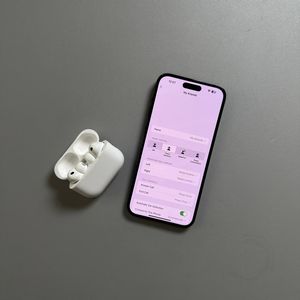
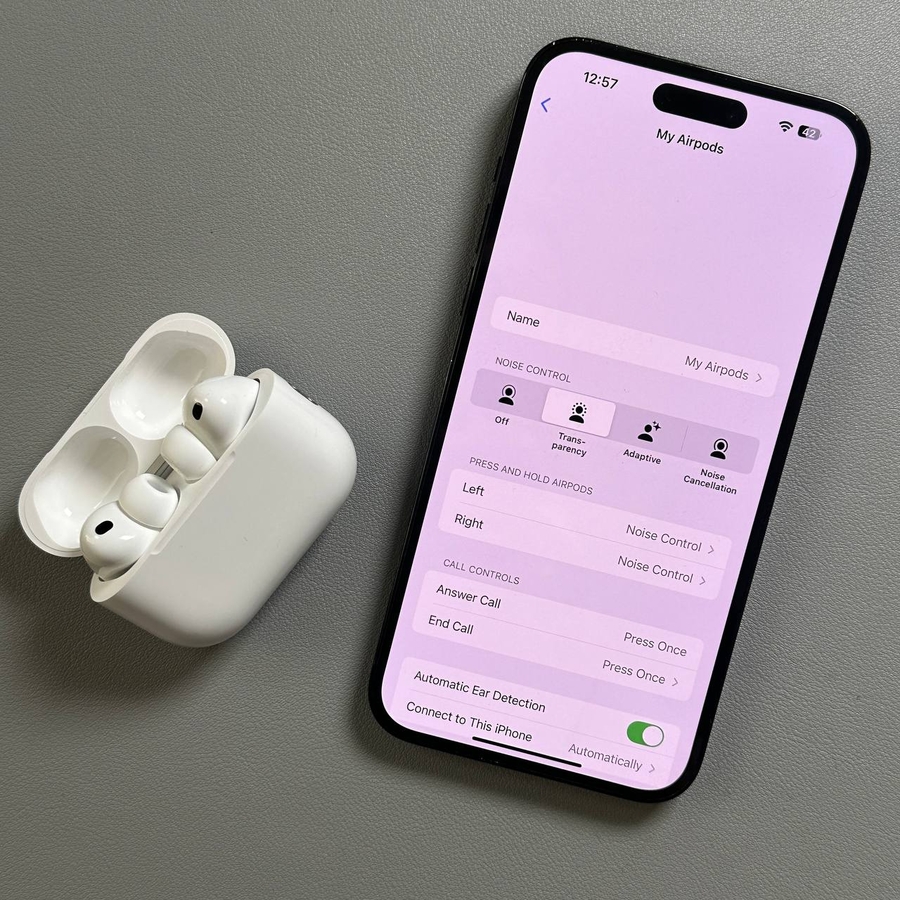
Step 1: Open the Settings on Your Device
To get started, make sure your Apple AirPods Pro 3 are connected to your iPhone. Then, unlock your device and open the main Settings app. You can usually find its gear-shaped icon on your home screen or within the app library.

Step 2: Access Headphones Section
Inside the Settings menu, look for the section at the top labeled "Headphones" while your AirPods are connected. Tap on this line to access more specific headphone settings.

Step 3: Locate Personalized Volume
Once you have accessed the headphones section, scroll through the list of options until you find "Personalized Volume". This option is nestled within the audio settings.

Step 4: Enable or Disable Personalized Volume
To enable Personalized Volume, simply tap once on the slider next to this option if you notice an empty background. When activated, the background of the slider will fill in with color, and your AirPods will automatically adjust the volume to match your current environment. If you prefer to turn this feature off, just tap the slider again when it is colorful, and the background will return to an empty state.


And there you have it! You have successfully learned how to enable and disable personalized volume on your Apple AirPods Pro 3.