Roland KC-400, KC-600, KC-99 - Keyboard Amplifier Manual
Main Features
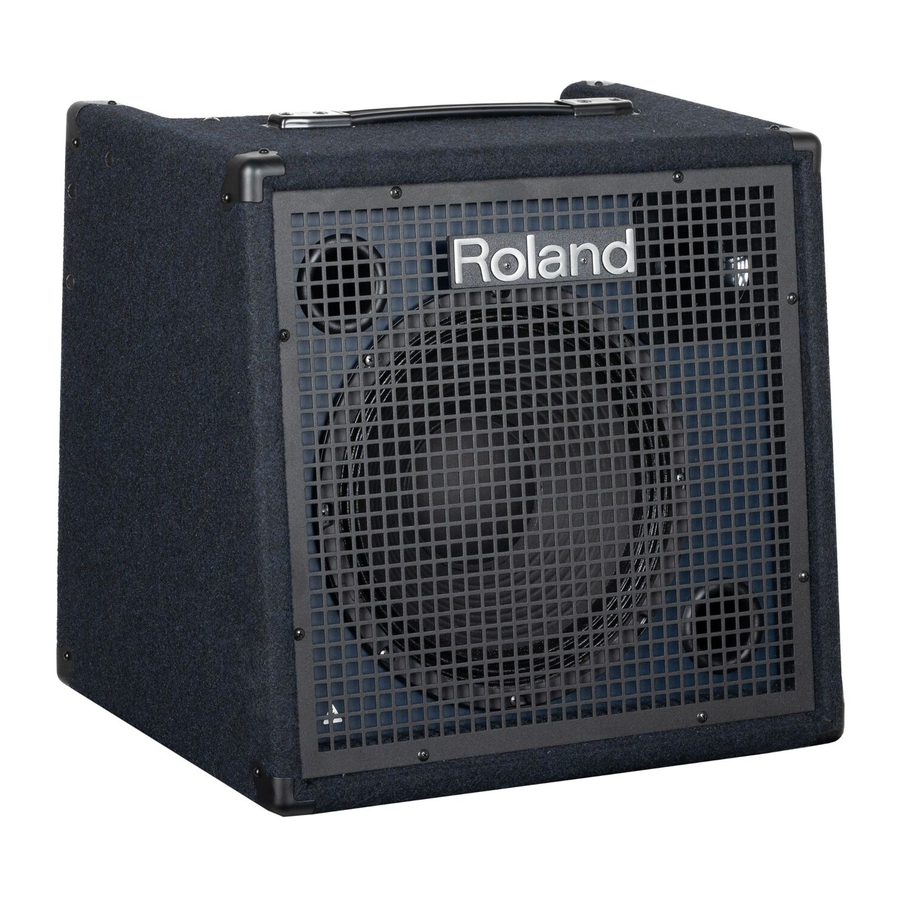
KC-400, KC-600 and KC-990 are keyboard amps designed for high sound quality, and are suitable for a variety of sources such as keyboards and sound modules.
- They feature a two-way design with a speaker(s) and tweeter.
| Speaker | Output | |
| KC-400 | 30 cm + horn tweeter | 150 W |
| KC-600 | 38 cm + horn tweeter | 200 W |
| KC-990 | 30 cm x 2 + horn tweeter x2 | 320 W (160 W + 160 W) |
- The input section is equipped with a mixer. CH1 additionally provides an XLR connector that supports mic input. On the KC-400 and KC-600, CH4 is equipped with a monitor function that's convenient for stage monitoring.
- SUB OUT is provided on the KC-400 and KC-600. If a powered subwoofer is connected to this jack, the low-frequency range can be reproduced even more powerfully.
- Two types of AUX IN jack (RCA phono and stereo mini-jack) are provided for easily connecting an audio player or other source. The KC-990 is additionally equipped with phone-type jacks as well.
- The KC-990 features a completely stereo design.
- The three-band equaliser is convenient for adjusting the character of the sound. 5 The headphone jack is convenient for monitoring at night, etc.
Panel Descriptions (KC-400/KC-600)
Top Panel
 - Top Panel")
- [CH1]–[CH4] knobs
Adjust the volume of the devices connected to CH1–CH4.
[OUTPUT SEL] knob
This knob lets you specify the output destination(s) of the signal that is input to CH4; you can choose from various combinations of the headphones, speaker, and line out. Choose from the following as appropriate for your situation.
![]()

| Setting | Explanation |
 | Output only to headphones. The signal is not output to the internal speaker or to line out. |
 +SP +SP | Output to headphones and the internal speaker. The signal is not output to line out. |
 +SP + LINE OUT +SP + LINE OUT | Output to all destinations: headphones, the internal speaker, and line out. |
- [AUX IN] knob
Adjusts the volume of the instrument that is connected to the AUX IN jacks. - [PHONES] knob
Adjusts the volume level of headphones output. - EQUALISER
[LOW] knob
Adjusts the sound level of the low-frequency range.
[MIDDLE] knob
Adjusts the sound level of the middle-frequency range.
[HIGH] knob
Adjusts the sound level of the high-frequency range.
* The EQUALISER knobs affect only the speaker output and the signal that is output from the SUB OUT jack.
- [SHAPE] button
Switching on this button boosts the high-frequency and lowfrequency ranges. This is a convenient way to compensate the tonal character or increase the impact when you're playing at a low volume.
* This applies only to the output of the internal speaker. - [MASTER] knob
Adjusts the overall volume.
This knob also simultaneously adjusts the volume that is output from the SUB OUT jack.
* The [MASTER] knob does not adjust the signal that is output from the LINE OUT jack. - [POWER] switch
Turns the power on/off. When the power is on, the indicator at the left of this switch is lit.
Rear Panel
 - Rear Panel")
* The illustration shows the KC-600. The KC-400 does not have LINE OUT: BALANCED jacks.
- CH1–CH4 input jacks
CH1: BALANCED jack, MIC/LINE jack
CH1 is equipped with a phone-type MIC/LINE jack and a balanced XLR-type BALANCED jack that is convenient for connecting a mic.
This channel supports levels ranging from mic input level (-50 dBu) through line input level (-20 dBu) for sources such as a sound module.
* Pin assignment of CH1 BALANCED jack

CH2–CH3: LINE jacks
Use these for connecting keyboards, sound modules, and other devices.
They accept line level input (-20 dBu).
CH4/MONITOR IN jack
Use this for connecting keyboards, sound modules, and other devices. This accepts line level input (-20 dBu).
You can use the [OUTPUT SEL] knob to specify the output destination.
- LINE OUT jack
Connect this to your mixer or recorder.
The EQUALISER knobs and the [MASTER] knob do not affect the volume or tone of the output from the LINE OUT jack.
* The KC-600 is equipped with XLR and phone jacks. These can both be used simultaneously.
* Pin assignment of LINE OUT: BALANCED jacks
![]()

[GND LIFT] switch (KC-600 only)
Loop hum noise may occur when other external devices are connected to the unit. In such instances, you may be able to mitigate the problem by switching the position of the [GND LIFT] switch. The [GND LIFT] switch should be normally set to OFF.
- AUX IN (STEREO, R/L) jacks
Here you can connect an audio player, electronic musical instrument, or similar audio source, and listen to it while you perform. - SUB OUT jack
You can connect this jack to a powered subwoofer or an external powered monitor. You can use the front panel knobs to adjust the volume and tone of the output from the SUB OUT jack. - STEREO LINK (IN, OUT) jacks
By using these jacks, you can combine two units into an even higher-output stereo system. - PHONES jack
You can connect headphones here.
* The settings of the EQUALISER knobs, the [SHAPE] button, and the [MASTER] knob do not affect the output from the PHONES jack. - AC IN jack
Connect the included power cord.
* Use only the power cord that was included with the unit.
Panel Descriptions (KC-990)
Top Panel
 - Top panel")
- [CH1]–[CH4] knobs
Adjust the volume of the devices connected to CH1–CH4.
[EFFECT] buttons
You can switch the internal effect on/off for each channel. If the button is on, the effect selected by the [EFFECT] knob is applied.
- [EFFECT] knob
The internal effect can be applied to the devices that are connected to CH1–CH4.
Depending on the position of the knob, it switches between four types of effects and adjusts the depth of the effect.
| Effect | Explanation |
| REVERB | This effect adds reverberation to the sound. |
| CHORUS | An effect that adds a slightly modulated sound to the direct signal, creating beautiful spaciousness and depth. |
| TREMOLO | An effect that cyclically modulates the volume. |
| ROTARY | This produces an effect like the sound of a rotary speaker. |
EFFECT indicator
The left and right indicators flash in alternately in time with the speed of the effect.
* When REVERB or CHORUS is selected, both indicators light up.
* When the effect is turned off using a footswitch, both indicators go out.
[SPEED] button (ROTARY)
Switches the speed of the ROTARY effect.
Press the button inward to make the modulation faster.
* The speed of rotation changes smoothly when you switch it.
* The [SPEED] button applies only to the ROTARY effect.
- [AUX IN/MONITOR IN] knob
Adjusts the volume of the devices that are connected to the AUX IN/MONITOR IN jacks.
[MUTE] (SPEAKER/LINE OUT) buttons
Specify whether AUX IN is used as MONITOR IN. If each [MUTE] button is on, the sound of the device connected to the AUX IN/ MONITOR IN jacks is no longer output from the internal speaker or from LINE OUT.
- EQUALIZER
[LOW] knob
Adjusts the sound level of the low-frequency range.
[MIDDLE] knob
Adjusts the sound level of the middle-frequency range.
[HIGH] knob
Adjusts the sound level of the high-frequency range.
- [PHONES] knob
Adjusts the volume level of headphones output. - [MASTER] knob
Adjusts the overall volume.
This knob also simultaneously adjusts the volume that is output from the SUB OUT jack.
* The [MASTER] knob does not adjust the signal that is output from the LINE OUT jack. - [POWER] switch
Turns the power on/off. When the power is on, the indicator at the left of this switch is lit.
Rear Panel
 - Rear Panel")
- CH1–CH4 input jacks
CH1: BALANCED jack, MIC/LINE jack
CH1 is equipped with a phone-type MIC/LINE jack and a balanced XLR-type BALANCED jack that is convenient for connecting a mic.
This channel supports levels ranging from mic input level (-50 dBu) through line input level (-20 dBu) for sources such as a sound module.
* Pin assignment of CH1 BALANCED jack

CH2–CH4: LINE jacks
Use these for connecting keyboards, sound modules, and other devices.
They accept line level input (-20 dBu).
- AUX IN/MONITOR IN (STEREO, R/L) jacks
Here you can connect an audio player, electronic musical instrument, or similar audio source, and listen to it while you perform. When using the unit as a monitor for the performer, you can use these jacks to monitor a guide click from a rhythm machine etc. that is heard only by the performer. - PHONES jack
You can connect headphones here. - STEREO LINK (IN, OUT L/R) jacks
By using these jacks, you can combine two units into an even higher-output stereo system. - LINE OUT jack
Connect this to your mixer or recorder.
The EQUALIZER knobs and the [MASTER] knob do not affect the volume or tone of the output from the LINE OUT jack.
* The KC-990 is equipped with XLR and phone jacks. These can both be used simultaneously.
* Pin assignment of LINE OUT: BALANCED jacks
![]()

[GND LIFT] switch
Loop hum noise may occur when other external devices are connected to the unit. In such instances, you may be able to mitigate the problem by switching the position of the [GND LIFT] switch. The [GND LIFT] switch should be normally set to OFF.
- FOOT SW jack
If a latch-type footswitch (sold separately: FS-5L, FS-6, FS-7) is connected here, you can use your foot to turn the internal effect on/off or adjust the speed of the rotary effect.


| Switch | Explanation | |
| TIP | EFFECT ON/OFF | Switches the internal effect on/ off. |
| RING | SPEED (SLOW/FAST) | Switches the speed of the ROTARY effect. |
- AC IN jack
Connect the included power cord.
* Use only the power cord that was included with the unit.
Connecting Your Equipment

Example connections KC-400/KC-600

Example connections KC-990
* To prevent malfunction and equipment failure, always turn down the volume, and turn off all the units before making any connections.
Turning the Power On/Off
* Once everything is properly connected, be sure to follow the procedure below to turn on their power. If you turn on equipment in the wrong order, you risk causing malfunction or equipment failure.
- Make sure that this unit's [MASTER] knob and the volume of the devices connected to this unit are set to "0."
- Turn on all the devices connected to the unit's input jacks (CH1–CH4, AUX IN, STEREO LINK IN).
- Turn on the unit.
- Turn on all the devices connected to the unit's output jacks (LINE OUT, SUB OUT, STEREO LINK OUT, PHONES).
- Adjust the volume levels for the devices.
Before switching off the power, lower the volume on each of the devices in your system and then turn off the devices in the reverse order to which they were switched on.
* Before turning the unit on/off, always be sure to turn the volume down. Even with the volume turned down, you might hear some sound when switching the unit on/off. However, this is normal and does not indicate a malfunction.
* If you need to turn off the power completely, first turn off the unit, then unplug the power cord from the power outlet. Refer to "To completely turn off power to the unit, pull out the plug from the outlet".
Setting the Volume of Each Device
In order to get optimum sound from this unit when performing, set the volume as described below.
- Use the [CH1]–[CH4] knobs to adjust the volume balance of the devices connected to CH1–CH4.
- Use the [LOW] knob, [MIDDLE] knob, and [HIGH] knob to adjust the tone to your taste.
- Use the [MASTER] knob to adjust the overall volume.
If the sound is distorted, adjust the [CH1]–[CH4] knobs and [MASTER] knob, or adjust the volume knob of the devices connected to the inputs (CH1–CH4, AUX IN).
Attaching Casters
KC-600/KC-990
Casters are included with the KC-600 and KC-990 to allow easy transportation.
The casters are not fitted to the unit when shipped from the factory.
To fit or remove the casters, follow the diagram.

* Be sure to set up and use these units in stable, level locations.
* To prevent injury, make sure that at least two persons work together when carrying the units.
* Be careful not to get your fingers or feet pinched.
Caution when transporting the KC-990
Since the KC-990 is heavy (42 kg), it must be carried by two or more people when transporting the unit to avoid injury that might occur if the unit tips over or falls down.


When carrying the unit, firmly grasp the left and right handles as shown in the illustration.
On flat surfaces, it is convenient to use the included casters.
Using Two Amps in Stereo (Stereo Link)
You can connect two amps of the same model and use them in stereo. This function is called "stereo link."
KC-400/KC-600 Connection Example

- Connect all your input devices to the main unit.
* Don't connect anything to the sub unit other than to its STEREO LINK IN jack. - Use a phone cable to connect the main unit's OUT jack to the sub unit's IN jack.
The main unit is R, and the sub unit is L.
![]()
- Power-on the main unit, and then power-on the sub unit.
For details, refer to "Turning the Power On/Off" - Adjust the volume of the devices that are connected to the main unit.
For details, refer to "Setting the Volume of Each Device" - Adjust the volume and tone of the main unit and sub unit, using the [VOLUME] knob and EQUALIZER knobs of each unit.
In general, use the same settings. Adjust each unit as necessary.

KC-990 Connection Example
There are two ways to make the KC-990's stereo link connection: basic connection using a single phone cable, or advanced connection using two phone cables.
If you use two phone cables to make the connection, all inputs of the two KC-990 units will be usable.
Basic Stereo Link
When connecting input devices to the KC-990 (L)

You can connect up to five input devices to CH1–CH4 and AUX IN.
- Connect all input devices to the KC-990 (L).
* Don't connect anything to the KC-990 (R) except to its STEREO LINK IN jack. - Use a phone cable to connect the KC-990 (L)'s LINK OUT R jack to the KC-990 (R)'s LINK IN jack.
![]()
MEMO
If you want to connect input devices to the KC-990 (R), use a phone cable to connect the KC-990 (R)'s LINK OUT L jack to the KC-990 (R)'s LINK IN jack. - Power-on the KC-990 (L), and then power-on the KC-990 (R).
For details, refer to "Turning the Power On/Off" - Adjust the volume of the devices that are connected to the KC-990 (L).
For details, refer to "Setting the Volume of Each Device" - Adjust the volume and tone of the KC-990 (L) and KC-990 (R), using the [VOLUME] knob and EQUALIZER knobs of each unit.
In general, use the same settings. Adjust each unit as necessary.

Advanced Stereo Link
This lets you connect up to ten input devices using the CH1–CH4 and AUX IN jacks of the two KC-990 units.

- Connect the input devices to the KC-990 (L) and KC-990 (R).
- Use a phone cable to connect the KC-990 (L)'s LINK OUT R jack to the KC-990 (R)'s LINK IN jack.
- Use a phone cable to connect the KC-990 (R)'s LINK OUT L jack to the KC-990 (L)'s LINK IN jack.
![]()
- Power-on the KC-990 (L), and then power-on the KC-990 (R).
For details, refer to "Turning the Power On/Off" - Adjust the volume of the devices that are connected to the KC-990 (L) and KC-990 (R).
For details, refer to "Setting the Volume of Each Device" - Adjust the volume and tone of the KC-990 (L) and KC-990 (R), using the [VOLUME] knob and EQUALIZER knobs of each unit.
In general, use the same settings. Adjust each unit as necessary.

Block Diagram

KC-400/KC-600

KC-990
Main Specifications
Roland KC-400: STEREO MIXING KEYBOARD AMPLIFIER
Roland KC-600: STEREO MIXING KEYBOARD AMPLIFIER
Roland KC-990: STEREO MIXING KEYBOARD AMPLIFIER
| KC-400 | KC-600 | KC-990 | |
| Rated Power Output | 150 W | 200 W | 320 W (160 W + 160 W) |
| Nominal Input Level (1 kHz) | CH1 (BALANCED, L/MONO, R): -50 – -20 dBu CH2 (L/MONO, R): -20 dBu CH3 (L/MONO, R): -20 dBu CH4/MONITOR IN (L/MONO, R): -20 dBu AUX IN (L, R, STEREO): -10 dBu STEREO LINK (IN): 0 dBu | CH1 (BALANCED, L/MONO, R): -50 – -20 dBu CH2 (L/MONO, R): -20 dBu CH3 (L/MONO, R): -20 dBu CH4 (L/MONO, R): -20 dBu AUX IN/MONITOR IN (AUX 1, AUX 2, AUX 3): -10 dBu STEREO LINK (IN): 0 dBu | |
| Nominal Output Level (1 kHz) | LINE OUT (L/MONO, R): +4 dBu STEREO LINK (OUT): 0 dBu SUB OUT: +4 dBu | LINE OUT (L/MONO, R): +4 dBu LINE OUT (BALANCED L, R): +4 dBu STEREO LINK (OUT): 0 dBu SUB OUT: +4 dBu | LINE OUT (L/MONO, R): +4 dBu LINE OUT (BALANCED L, R): +4 dBu STEREO LINK (OUT): 0 dBu |
| Speakers | Full Range: 30 cm (12 inches) x 1 Horn Tweeter: x 1 | Full Range: 38 cm (15 inches) x 1 Horn Tweeter: x 1 | Full Range: 30 cm (12 inches) x 2 Horn Tweeter: x 2 |
| Indicator | Power | ||
| Connectors | CH1 (BALANCED) jack: XLR type CH1 (L/MONO, R) jacks: 1/4-inch phone type CH2 (L/MONO, R) jacks: 1/4-inch phone type CH3 (L/MONO, R) jacks: 1/4-inch phone type CH4/MONITOR IN (L/MONO, R) jacks: 1/4-inch phone type LINE OUT (L/MONO, R) jacks: 1/4-inch phone type AUX IN (L, R) jacks: RCA phono type AUX IN (STEREO) jacks: Stereo miniature phone type SUB OUT jack: 1/4-inch phone type STEREO LINK (IN, OUT) jacks: 1/4-inch phone type PHONES jack: Stereo 1/4-inch TRS phone type (mono signal output) | CH1 (BALANCED) jack: XLR type CH3 (L/MONO, R) jacks: 1/4-inch phone type CH4/MONITOR IN (L/MONO, R) jacks: 1/4-inch phone type | CH1 (BALANCED) jack: XLR type CH1 (L/MONO, R) jacks: 1/4-inch phone type CH2 (L/MONO, R) jacks: 1/4-inch phone type CH3 (L/MONO, R) jacks: 1/4-inch phone type CH4 (L/MONO, R) jacks: 1/4-inch phone type AUX IN/MONITOR IN AUX 1 (L/MONO, R) jacks: 1/4-inch phone type AUX 2 (L, R) jacks: RCA phono type AUX 3 (STEREO) jacks: Stereo miniature phone type PHONES jack: Stereo 1/4-inch TRS phone type (mono signal output) STEREO LINK (IN, OUT L, OUT R) jacks: 1/4-inch phone type LINE OUT (L/MONO, R) jacks: 1/4-inch phone type LINE OUT (BALANCED L, R) jacks: XLR type FOOT SW jack: 1/4-inch TRS phone type |
| Power Consumption | 40 W | 50 W | 98 W |
| Dimensions | 490 (W) x 385 (D) x 470 (H) mm 19-5/16 (W) x 15-3/16 (D) x 18-9/16 (H) inches | 590 (W) x 445 (D) x 590 (H) mm 23-1/4 (W) x 17-9/16 (D) x 23-1/4 (H) inches (including casters) 590 (W) x 445 (D) x 536 (H) mm 23-1/4 (W) x 17-9/16 (D) x 21-1/8 (H) inches (excluding casters) | 759 (W) x 470 (D) x 585 (H) mm 29-15/16 (W) x 18-9/16 (D) x 23-1/16 (H) inches (including casters) 759 (W) x 470 (D) x 534 (H) mm 29-15/16 (W) x 18-9/16 (D) x 21-1/16 (H) inches (excluding casters) |
| Weight | 22 kg 48 lbs 9 oz | 29 kg 63 lbs 15 oz | 42 kg 92 lbs 10 oz |
| Accessory | Owner's Manual | Owner's Manual Casters ( x 4) |
* 0 dBu = 0.775 Vrms
* This document explains the specifications of the product at the time that the document was issued. For the latest information, refer to the Roland website.

Download manual
Here you can download full pdf version of manual, it may contain additional safety instructions, warranty information, FCC rules, etc.
Download Roland KC-400, KC-600, KC-99 - Keyboard Amplifier Manual


