Gigabyte AI TOP 500 TRX50 Manual
Box Contents
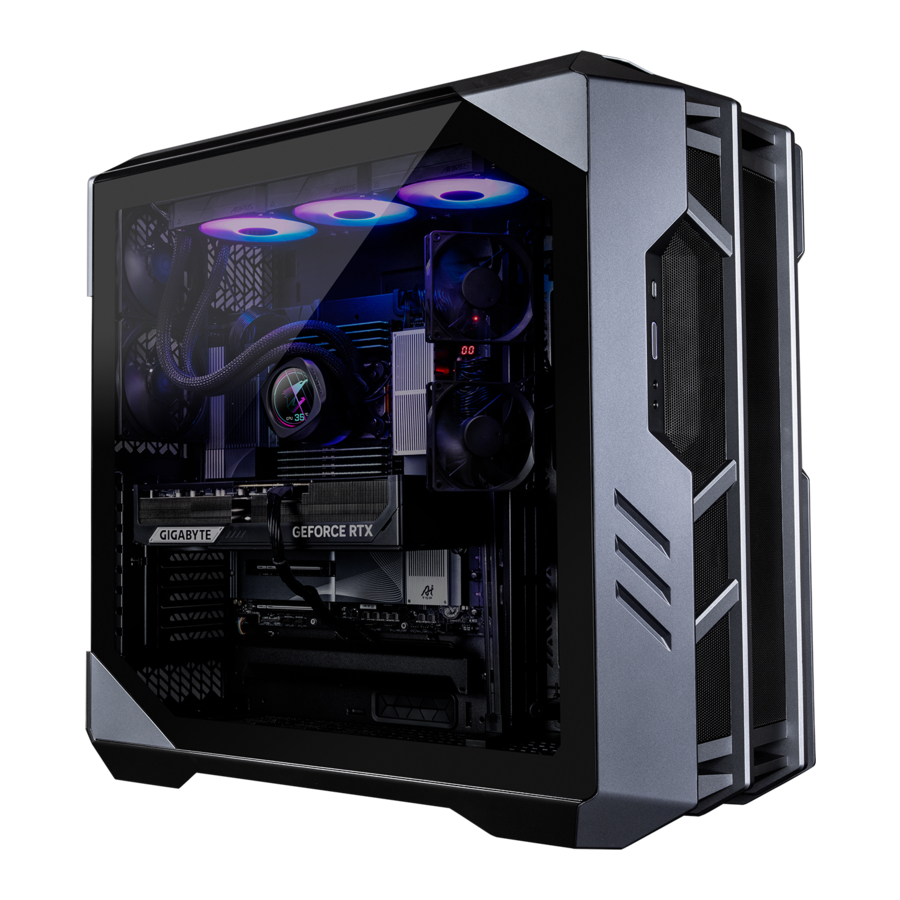
- AI TOP 500 TRX50 Premium Gaming & AI Empowered Desktop PC (Note)
- Quick Start Guide
- Antenna
- Accessory Cables
- Case Accessory
* The box contents above are for reference only and the actual items shall depend on the product package you obtain. The box contents are subject to change without notice.
(Note) Model name of the AI TOP 500 TRX50 Premium Gaming & AI Empowered Desktop PC:
* AT5A7N9-5000
* AT5A6N9-5001
* AT5A6N9-0002
* AT5A6N9-0003
Hardware Setup
Safety Information
- Before connecting to the power outlet, make sure that the voltage rating of the power cable is compatible with the power specification in the country where you are located.
- The power cord plug must be connected to a properly wired and grounded power outlet.
- Be sure that the power outlet you plug the power cord into is easily accessible and located as close to the equipment operator as possible. When you need to disconnect power to the equipment, be sure to unplug the power cord from the electrical outlet.
- Do not touch the plug with wet hands, otherwise easily cause electric shock.
- Protect the power cord from being tread upon or pinched, particularly at the plug.
- To avoid damage of internal component, do not place the product on a vibrating surface.
- Operating temperature: 5~35oC.
- Do not place the product near any heat sources such as electric radiators, heat registers, stoves or other devices (including amplifiers) that produce heat.
- The holes or openings on this product are for ventilation to ensure reliable operation of the product and to protect it from overheating. Do not cover or block the ventilation holes with any objects.
- Never push objects of any kind into this product through cabinet slots as they may touch dangerous voltage points or short-out parts that could result in a fire or electric shock.
- Never spill liquid of any kind onto or into the product.
- Do not use this product near water, drinks, or all types of liquids. Do not expose this apparatus to rain, liquid or moisture. Failure to do so may result in electric shock or damage.
- This product is not water proof or oil-proof.
- Clean the equipment with a soft, dry cloth.
- The manufacturer specifies that the thumbscrews normally should be tightened with a screwdriver, use of thumbscrews is not considered to compromise the basic principles of safety associated with the Safety Standard.
- For the motherboard battery replacement, refer to the motherboard's User Manual.
Hardware Information
System Overview

- Reset Button
The reset button allow users to quickly reset the computer - Power Button
The power button allows users to turn on/off the computer. - Mic In
The mic in jack. - Line Out
The line out jack. - USB 3.2 Gen 1 Port
The USB 3.2 Gen 1 port supports the USB 3.2 Gen 1 specification and is compatible to the USB 2.0 specification. Use this port for USB devices. - USB Type-C® Port (USB 3.2 Gen 2 Support)
The reversible USB port supports the USB 3.2 Gen 2 specification and is compatible to the USB 3.2 Gen 1 and USB 2.0 specification. Use this port for USB devices.

- Q-Flash Plus Button (Note)
Q-Flash Plus allows you to update the BIOS when your system is off (S5 shutdown state). Save the latest BIOS on a USB thumb drive and plug it into the Q-Flash Plus port, and then you can now flash the BIOS automatically by simply pressing the Q-Flash Plus button. The QFLED will flash when the BIOS matching and flashing activities start and will stop flashing when the main BIOS flashing is complete.
--
(Note) To enable the Q-Flash Plus function, refer to "Using Q-Flash Plus" of the manual. - Antenna Connectors (2T2R)
Use this connector to connect an antenna.
![information]() Ensure the antenna is securely connected to the antenna connectors and then aim the antennas correctly for better signal reception.
Ensure the antenna is securely connected to the antenna connectors and then aim the antennas correctly for better signal reception. - USB 3.2 Gen 2 Type-A Port (Red)
The USB 3.2 Gen 2 port supports the USB 3.2 Gen 2 specification and is compatible to the USB 3.2 Gen 1 and USB 2.0 specification. Use this port for USB devices - Line Out
The line out jack. - Mic In
The Mic in jack. - DisplayPort In port
The DisplayPort In port offers video outputs to the motherboard. Refer to the pictures below and h the USB4® USB Type-C®port (DisplayPort) for more information.- Step 1: Connect the included DisplayPort cable from the graphics card to the DisplayPort In port on the back panel.
![]()
- Step 2: Then connect the USB Type-C® or DisplayPort devices to h USB4® USB Type-C® port (DisplayPort) to complete.
![]()
- Step 1: Connect the included DisplayPort cable from the graphics card to the DisplayPort In port on the back panel.
- RJ-45 LAN Port
The Gigabit Ethernet LAN port provides Internet connection at up to 10 GB data rate. The following describes the states of the LAN port LEDs.

- USB4® USB Type-C® Port (DisplayPort)
This port has display and data transmission capabilities. This port supports standard USB4® USB Type-C® and DisplayPort display output. You can connect a USB Type-C® monitor to this port or use an adapter cable to connect a standard DisplayPort monitor. When connecting a DisplayPort monitor, the actual supported resolution may vary depending on the external graphics card and the monitor you are using. Also, the connector is reversible and supports the USB4® specification and is compatible to the USB 3.2 Gen 2, USB 3.2 Gen 1, and USB 2.0 specifications. You can use this port for USB devices, too. - USB 3.2 Gen 2 Type-A Port (Red) (Q-Flash Plus Port)
The USB 3.2 Gen 2 port supports the USB 3.2 Gen 2 specification and is compatible to the USB 3.2 Gen 1 and USB 2.0 specification. Use this port for USB devices. Before using Q-Flash Plus (Note), make sure to insert the USB flash drive into this port first. - USB4® USB Type-C® Port
The USB4® port supports the USB4® specification and is compatible to the USB 3.2 Gen 2, USB 3.2 Gen 1, and USB 2.0 specifications. Use this port for USB devices.


 Please visit GIGABYTE's website for details on configuring the audio software.
https://www.gigabyte.com/WebPage/699/realtek4080-audio.html

- When removing the cable connected to a back panel connector, first remove the cable from your device and then remove it from the motherboard.
- When removing the cable, pull it straight out from the connector. Do not rock it side to side to prevent an electrical short inside the cable connector.

- HDMI Port
![]()
The connector supports HDMI 2.1b version. The connector supports DisplayPort 2.1b version. - DisplayPort
The connector supports DisplayPort 2.1b version.

Getting Started
- This product is designed and intended to be used in vertical position only.
- Peripheral devices are not included.
- We recommend that you connect the monitor cable to the graphics card.
Before making the connections, please open the case and remove the protection foam bag inside.
Connecting Peripheral Devices
Connect your peripheral devices such as keyboard, mouse, monitor, and etc. to the desktop computer.

Connecting the Power Cord
Connect the included power cord to the desktop computer and a power outlet.

Turning on
Press the power button to turn on the desktop computer.

BIOS Setup
Entering the BIOS Setup
To access the BIOS Setup program, press the <Delete> key during the POST when the power is turned on. When the power is turned off, the battery on the motherboard supplies the necessary power to the CMOS to keep the configuration values in the CMOS.
Startup Screen
The following startup Logo screen will appear when the computer boots.

Function Keys:
<DEL>: BIOS SETUP\Q-FLASH
Press the <Delete> key to enter BIOS Setup or to access the Q-Flash utility in BIOS Setup.
<F12>: BOOT MENU
Boot Menu allows you to set the first boot device without entering BIOS Setup. In Boot Menu, use the up arrow key <h> or the down arrow key <i> to select the first boot device, then press <Enter> to accept. The system will boot from the device immediately.
Note: The setting in Boot Menu is effective for one time only. After system restart, the device boot order will still be based on BIOS Setup settings.
<END>: Q-FLASH
Press the <End> key to access the Q-Flash utility directly without having to enter BIOS Setup first.
- Because BIOS flashing is potentially risky, if you do not encounter problems using the current version of BIOS, it is recommended that you not flash the BIOS. To flash the BIOS, do it with caution. Inadequate BIOS flashing may result in system malfunction.
- It is recommended that you not alter the default settings (unless you need to) to prevent system instability or other unexpected results. Inadequately altering the settings may result in system's failure to boot. If this occurs, try to clear the CMOS values and reset the board to default values. (Refer to the "Load Optimized Defaults" section for how to clear the CMOS values.)
Using Q-Flash Plus
- Before You Begin
- From GIGABYTE's website, download the latest compressed BIOS update file that matches your product model.
- Uncompress the downloaded BIOS file, save it to your USB flash drive, and rename it to GIGABYTE.bin.
![warning]() Note: The USB flash drive must use the FAT32/16 file system and it must be a USB 2.0 flash drive.
Note: The USB flash drive must use the FAT32/16 file system and it must be a USB 2.0 flash drive. - Connect the power cables to the 12V power connector (connect either one if there are two) and main power connector.
- Please turn on the power supply before connecting the USB flash drive to the Q-Flash Plus port on the back panel.
- Using Q-Flash Plus
Press the Q-Flash Plus button and the system will automatically search and match the BIOS file in the USB flash drive on the Q-Flash Plus port. The QFLED will flash during the BIOS matching and flashing process. Wait for 6-8 minutes and the LEDs will stop flashing when the BIOS flashing is complete.


- If you choose to update the BIOS manually, first make sure that your system is off (S5 shutdown state).
- If your motherboard has a BIOS switch and a SB switch, reset them to their default settings. (Default setting for the BIOS switch: Boot from the main BIOS; default setting for the SB switch: Dual BIOS)
- The DualBIOS™ feature will continue to update the backup BIOS after the main BIOS has been flashed and the system restarts. After completion, the system will reboot again and boot from the main BIOS.
Installing the Operating System
First-Time Startup
When you start the computer for the first time, the Windows® operating system will guide you through a series of setup screens. Please follow the on-screen instructions to complete the basic personalization settings. The setup items include:
- Personalize
- Get online
- Settings
- Your account
After completing the basic setup steps, Windows® will begin installing applications and applying your preferences. Please ensure that the computer is connected to a stable and sufficient power source during the setup process. Once you have successfully signed in to your user account, the desktop screen will appear.
The appearance of the operating system may vary depending on your actual usage and configuration.
- Install the Motherboard Drivers
After you install the operating system, a dialog box will appear on the bottom-right corner of the desktop asking if you want to download and install the motherboard drivers and GIGABYTE applications via GIGABYTE Control Center (GCC). ClickInstall to proceed with the installation.
(In BIOS Setup, make sure Settings\IO Ports\Gigabyte Utilities Downloader Configuration\Gigabyte Utilities Downloader is set to Enabled.)

When the EULA (End User License Agreement) dialog box appears, press <Accept> to install GIGABYTE Control Center (GCC). On the GIGABYTE CONTROL CENTER screen, select the drivers and applications you want to install and click Install.

- Install the Graphics Card Drivers
Please download the graphics card driver and utilities from GIGABYTE's website.


System recovery (Restore your operating system)
When something is going wrong with the laptop operating system, the storage of the laptop has a hidden partition containing a full back up image of the operating system that can be used to restore the system to factory default settings.
- If the storage has been switched or the partition deleted, the recovery option will no longer be available and a recovery service will be needed.
- The recovery function is only available on devices with O/S preinstalled. Devices with EFI SHELL do not have the recovery function.
Launch system recovery
The system recovery feature is preinstalled before the laptop is shipped from the factory. The option menu allows you to launch the Windows recovery tool to reinstall the operating system to factory default. The brief introduction below will show you how to start the recovery tool and restore your system.
Recovery Guide:
Step 1: Turn off and restart the system.
Step 2: During the turn on process, press and hold F9 key to launch the tool.
Step 3:

Choose "Troubleshoot" to enter the recovery settings. (Also you can choose "Continue" to exit recovery system and continue to System for files or data backup.)
There are two options for system recovery:
- Reset this PC:
You can choose to keep or remove your files and then reinstalls Windows without losing your files. - Smart Recovery:
Your PC settings will be restored to factory default settings. Caution: All personal data and files will be lost.
Step 4:

The recovery will be activated and you will see the option buttons on the window. Click on "Yes" to start it.
- Once the "Recovery" is selected, your personal data and files will be deleted after the laptop starts restoring, and the operating system will be reset to factory default settings.
- A progress indicator bar will show on the window when the recovery process is running. Do not turn off the power.
After the system recovery is completed, you will see the option button on the window, please click on "Shutdown".
Step 5:

Advanced options
 | System Restore Use a restore point recorded on your PC to restore Windows. |
 | System Image Recovery Recover Windows using a specific system image file. |
 | Startup Repair Fix problems that keep Windows from loading. |
 | Command Prompt Use the Command Prompt for advanced trobleshooting. |
 | UEFI Firmware Settings Change settings in your PC's UEFI firmware. |
 | Startup Settings Change Windows Startup behavior. |
Service / Support
- GIGABYTE provides an online query system for service status. To check the status of repair service, prepare your RMA number and be ready to provide any other information the query system requests. You can make a Repair Status Inquiry easily by going to: https://www.gigabyte.com/Support/Consumer/Repair/Track
- For more information about Service / Support, please click: https://www.gigabyte.com/Support/Consumer
TEL: +886-2-8912-4000,
FAX: +886-2-8912-4005
Tech. and Non-Tech. Support (Sales/Marketing): https://esupport.gigabyte.com
WEB address (English): https://www.gigabyte.com
- GIGABYTE eSupport
To submit a technical or non-technical (Sales/Marketing) question, please link to: https://esupport.gigabyte.com


References

Download manual
Here you can download full pdf version of manual, it may contain additional safety instructions, warranty information, FCC rules, etc.
Download Gigabyte AI TOP 500 TRX50 Manual


